A Slice of Comfort, A Taste of Celebration
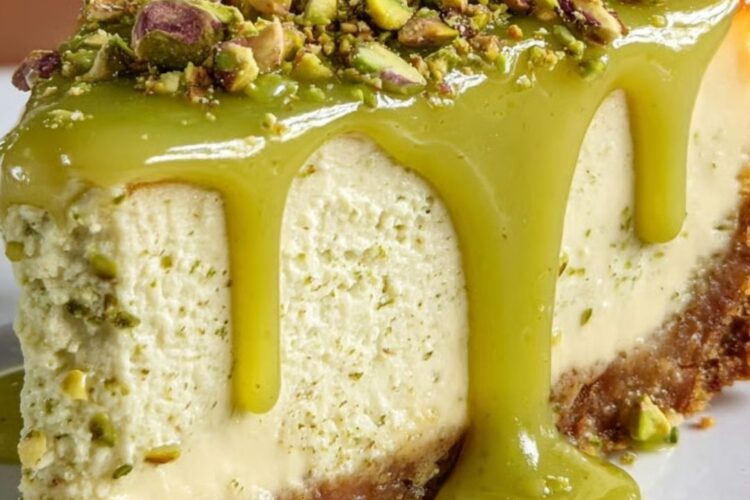
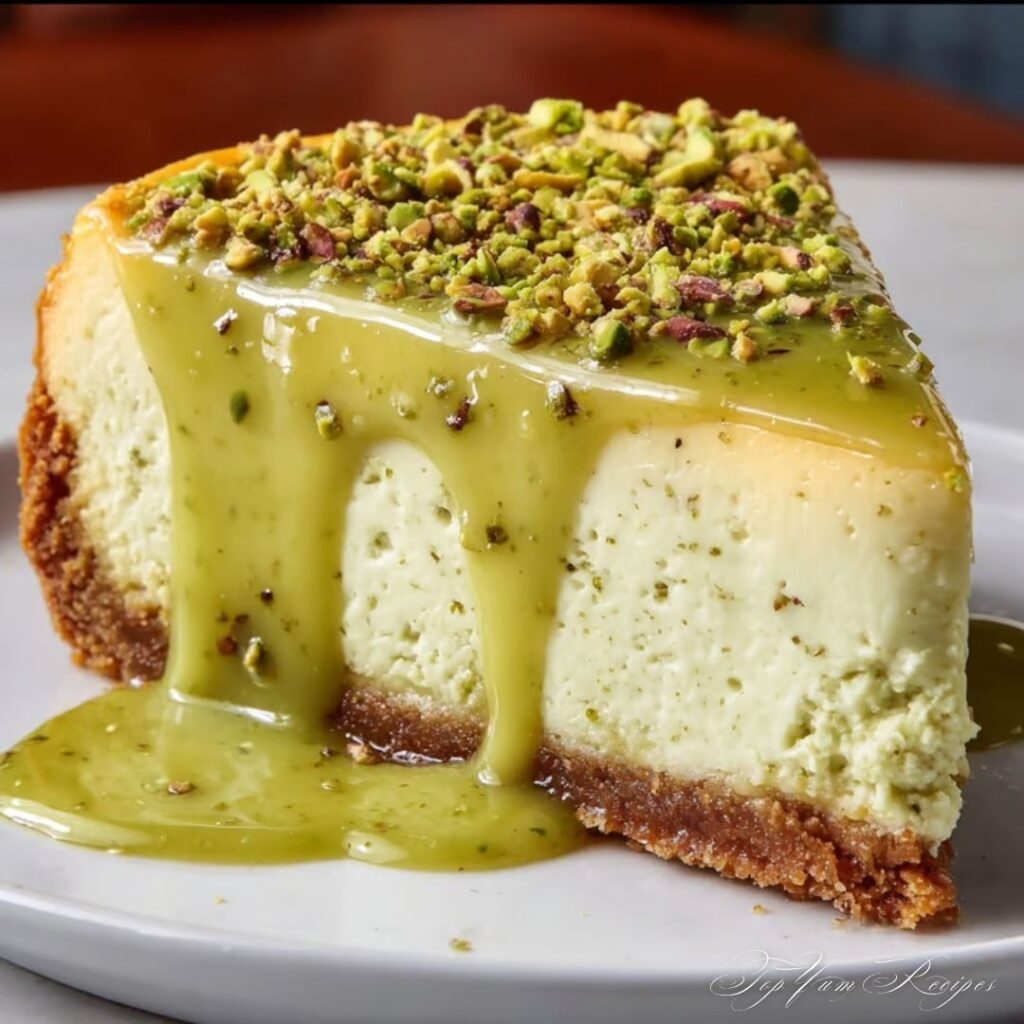
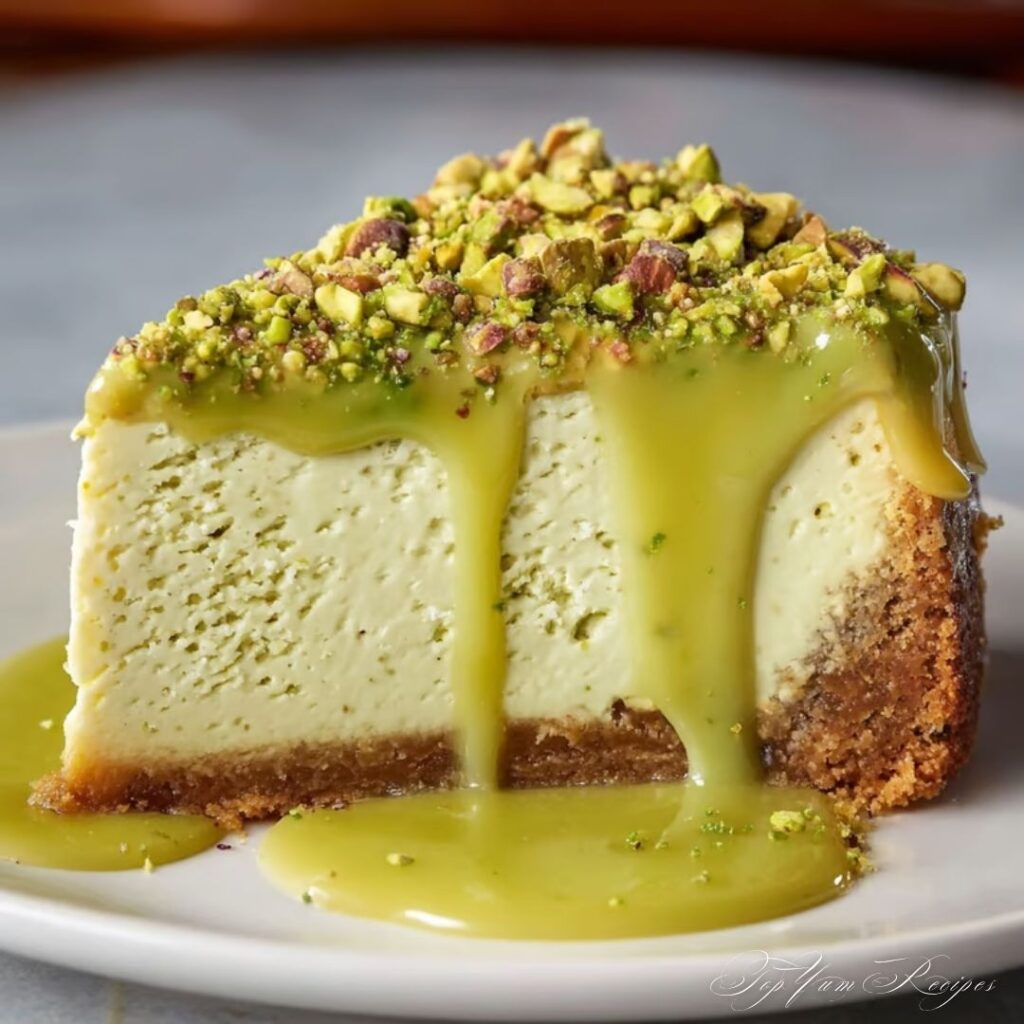
There’s something magical about cutting into a cheesecake — that soft resistance of the creamy filling giving way to the crumbly base. But when you take that first bite of pistachio cheesecake with topping, you realize this isn’t just dessert. It’s indulgence, comfort, and elegance, all in one.
If you’ve ever wanted to impress your family or friends with a dessert that looks like it came from a bakery yet feels warm and homemade, this recipe is for you. The nutty flavor of pistachios, the richness of cream cheese, and that dreamy topping all come together to create a treat you’ll want to make again and again.
Why You’ll Love Pistachio Cheesecake With Topping
You’re not just making another cheesecake — you’re creating a showstopper. Here’s why this dessert stands out:
- Rich flavor, balanced sweetness: Pistachios bring a natural nuttiness that cuts through the richness of cream cheese.
- A texture lover’s dream: Smooth filling, crunchy base, and soft topping — every bite is perfectly layered.
- Visually stunning: The natural green hue of pistachios gives it a touch of sophistication.
- Healthier than most cheesecakes: Pistachios are full of good fats, fiber, and protein.
According to the USDA, pistachios are rich in antioxidants and healthy fats — so yes, you can feel a little less guilty about that second slice!
Ingredients You’ll Need
Before you start, gather everything you need. Baking is all about preparation — and when you have everything ready, the process becomes smooth and enjoyable.
For the Pistachio Graham Crust
| Ingredient | Quantity | Notes |
|---|---|---|
| Graham crackers (crushed) | 1 ½ cups | Use gluten-free if preferred |
| Ground pistachios | ½ cup | Unsalted for better flavor control |
| Melted butter | ⅓ cup | Adds richness and helps crust hold together |
| Sugar | 2 tbsp | Optional, adjust to taste |
For the Cheesecake Filling
| Ingredient | Quantity | Notes |
|---|---|---|
| Cream cheese | 24 oz (3 packs) | Room temperature for smooth blending |
| Granulated sugar | ¾ cup | Balance sweetness to your liking |
| Sour cream | 1 cup | Adds tang and creaminess |
| Pistachio paste or pudding mix | ½ cup | For authentic flavor and color |
| Eggs | 3 large | Room temperature |
| Vanilla extract | 1 tsp | Enhances overall taste |
For the Topping
| Ingredient | Quantity | Notes |
|---|---|---|
| Whipped cream | 1 cup | Homemade or ready-made |
| Chopped pistachios | ¼ cup | For crunch and garnish |
| White chocolate drizzle | Optional | Adds a touch of decadence |
Step-by-Step Guide to Making Pistachio Cheesecake With Topping
This recipe might look fancy, but once you break it down, it’s quite simple. Take it one step at a time and enjoy the process.
Step 1 – Prepare the Crust
- Combine the crushed graham crackers, ground pistachios, sugar, and melted butter in a bowl.
- Mix until everything resembles wet sand.
- Press the mixture into the bottom of a springform pan, ensuring it’s even and firm.
- Bake for about 10 minutes at 325°F (160°C), then let it cool completely.
Tip: If you like extra crunch, toast the pistachios lightly before grinding them. It deepens the flavor beautifully.
Step 2 – Make the Filling
- In a large mixing bowl, beat the cream cheese and sugar until smooth and fluffy.
- Add the sour cream, pistachio paste (or pudding mix), and vanilla extract. Mix until fully combined.
- Add the eggs, one at a time, mixing gently after each addition. Avoid overbeating once the eggs are in.
- Pour the mixture over your cooled crust, spreading it evenly.
Pro Tip: Overmixing can lead to cracks in your cheesecake. A gentle mix ensures a silky texture.
Step 3 – Bake to Perfection
- Place your pan in a water bath (wrap the pan with foil to prevent leaks).
- Bake at 325°F (160°C) for about 60–70 minutes.
- The edges should be firm, but the center should still jiggle slightly.
- Turn off the oven, open the door slightly, and let it cool gradually for 1 hour.
This slow cooling process prevents cracks from forming.
Step 4 – Chill and Set
Refrigerate your cheesecake for at least 4 hours, or overnight for the best texture. The wait might feel long, but this step is essential — chilling allows the flavors to blend and the texture to firm up beautifully.
Step 5 – Add the Topping
Now comes the fun part — decorating your masterpiece.
- Spread a generous layer of whipped cream over the top.
- Sprinkle with chopped pistachios.
- Drizzle with melted white chocolate if you’re feeling fancy.
Optional twist: You can also add a layer of pistachio ganache or a fruit glaze (like raspberry) for contrast.
Expert Tips for the Best Pistachio Cheesecake With Topping
If you want that perfect bakery-quality finish, keep these pro tips in mind:
- Always use room temperature ingredients for a smooth batter.
- Don’t skip the water bath — it’s the secret to creamy, crack-free cheesecake.
- Toast your pistachios for richer flavor.
- Chill overnight for the best texture.
- Use a sharp, hot knife for clean slices — wipe between each cut.
Creative Variations You Can Try
You can take this base recipe and make it your own. Here are a few ideas to experiment with:
Mini Pistachio Cheesecakes
Use muffin tins with cupcake liners for bite-sized desserts. Perfect for parties or gifting!
No-Bake Pistachio Cheesecake
Skip the oven! Use gelatin or whipped cream to help the filling set. Chill for 6–8 hours.
Pistachio and White Chocolate Swirl Cheesecake
Pour half of your batter, then swirl in melted white chocolate. Bake as usual for a marbled effect.
Pistachio and Honey Cheesecake
Drizzle honey over the top before serving for an elegant Middle Eastern twist.
Serving and Pairing Ideas
Presentation matters as much as flavor. Here’s how to make your cheesecake shine:
- Serve chilled with a sprinkle of extra chopped pistachios.
- Pair with black coffee, espresso, or green tea for a perfect balance.
- Add fresh berries or raspberry coulis on the side for a fruity contrast.
- For holidays, decorate with edible gold flakes or rose petals — they pair beautifully with pistachio flavor.
Storage and Make-Ahead Tips
You’ll be glad to know this dessert is make-ahead friendly.
- Refrigerator: Store in an airtight container for up to 5 days.
- Freezer: Wrap the cheesecake (without topping) tightly and freeze for up to 2 months.
- Thawing: Let it thaw in the fridge overnight before serving.
If you’re hosting a gathering, you can bake it two days in advance and add the topping just before serving — it’ll look freshly made.
Frequently Asked Questions About Pistachio Cheesecake With Topping
Can I make pistachio cheesecake without baking?
Yes! A no-bake version works perfectly. Use gelatin or instant pudding mix to help the filling set, and chill for several hours until firm.
What can I use instead of pistachio paste?
If you can’t find pistachio paste, blend unsalted pistachios with a splash of cream or milk until smooth. You’ll get a similar flavor and texture.
How do I prevent my cheesecake from cracking?
Use a water bath, don’t overmix the batter once the eggs are added, and let it cool gradually with the oven door slightly open.
Can I use other toppings?
Absolutely! Try cream cheese frosting, pistachio ganache, fruit glaze, or even caramel sauce for a creative twist.
Can I make it vegan or dairy-free?
Yes! Use vegan cream cheese, coconut yogurt, and plant-based butter. Swap eggs for a flaxseed or cornstarch substitute.
Conclusion: Your Dessert, Your Masterpiece
You’ve just created something truly special — a pistachio cheesecake with topping that’s creamy, nutty, and irresistibly elegant. Whether you’re baking for a celebration, a quiet evening at home, or simply because you love desserts, this cheesecake delivers pure joy in every slice.
Remember, the secret ingredient isn’t just the pistachios — it’s the love and care you pour into every step.
So go ahead — take that first bite, close your eyes, and enjoy the silky, nutty perfection you made with your own hands.
Call to Action
If this recipe made your day sweeter, share it with your friends or family who love baking as much as you do.
Want more comforting desserts like this? Subscribe to our newsletter for weekly recipes that bring happiness straight from your oven to your heart. 💚

Pistachio Cheesecake With Topping
Course: Irresistible DessertsCuisine: AmericanDifficulty: Medium12
servings35
minutes1
hour8
minutes1
hour43
minutesIngredients
- For the Pistachio Graham Crust
Graham crackers (crushed) 1 ½ cups Use gluten-free if preferred
Ground pistachios ½ cup Unsalted for better flavor control
Melted butter ⅓ cup Adds richness and helps crust hold together
Sugar 2 tbsp Optional, adjust to taste
- For the Cheesecake Filling
Cream cheese 24 oz (3 packs) room temperature for smooth blending
Granulated sugar ¾ cup Balance sweetness to your liking
Sour cream 1 cup Adds tang and creaminess
Pistachio paste or pudding mix ½ cup For authentic flavor and color
Eggs 3 large Room temperature
Vanilla extract 1 tsp Enhances overall taste
- For the Topping
Whipped cream 1 cup Homemade or ready-made
Chopped pistachios ¼ cup For crunch and garnish
White chocolate drizzle Optional Adds a touch of decadence
Directions
- Step 1 – Prepare the Crust
Combine the crushed graham crackers, ground pistachios, sugar, and melted butter in a bowl.
Mix until everything resembles wet sand.
Press the mixture into the bottom of a springform pan, ensuring it’s even and firm.
Bake for about 10 minutes at 325°F (160°C), then let it cool completely.
Tip: If you like extra crunch, toast the pistachios lightly before grinding them. It deepens the flavor beautifully. - Step 2 – Make the Filling
In a large mixing bowl, beat the cream cheese and sugar until smooth and fluffy.
Add the sour cream, pistachio paste (or pudding mix), and vanilla extract. Mix until fully combined.
Add the eggs, one at a time, mixing gently after each addition. Avoid overbeating once the eggs are in.
Pour the mixture over your cooled crust, spreading it evenly.
Pro Tip: Overmixing can lead to cracks in your cheesecake. A gentle mix ensures a silky texture. - Step 3 – Bake to Perfection
Place your pan in a water bath (wrap the pan with foil to prevent leaks).
Bake at 325°F (160°C) for about 60–70 minutes.
The edges should be firm, but the center should still jiggle slightly.
Turn off the oven, open the door slightly, and let it cool gradually for 1 hour.
This slow cooling process prevents cracks from forming. - Step 4 – Chill and Set
Refrigerate your cheesecake for at least 4 hours, or overnight for the best texture. The wait might feel long, but this step is essential — chilling allows the flavors to blend and the texture to firm up beautifully. - Step 5 – Add the Topping
Now comes the fun part — decorating your masterpiece.
Spread a generous layer of whipped cream over the top.
Sprinkle with chopped pistachios.
Drizzle with melted white chocolate if you’re feeling fancy.
Optional twist: You can also add a layer of pistachio ganache or a fruit glaze (like raspberry) for contrast.
Recipe Video
Notes
- Expert Tips for the Best Pistachio Cheesecake With Topping
If you want that perfect bakery-quality finish, keep these pro tips in mind:
Always use room temperature ingredients for a smooth batter.
Don’t skip the water bath — it’s the secret to creamy, crack-free cheesecake.
Toast your pistachios for richer flavor.
Chill overnight for the best texture.
Use a sharp, hot knife for clean slices — wipe between each cut.