The Warm Hug of Chocolate and Cinnamon
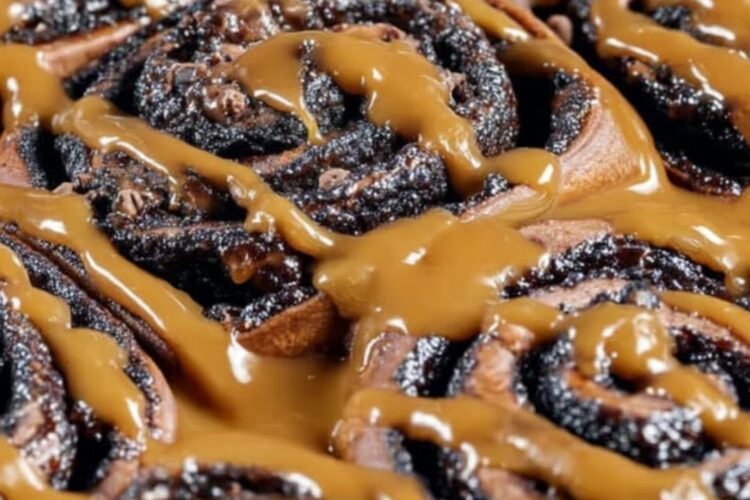
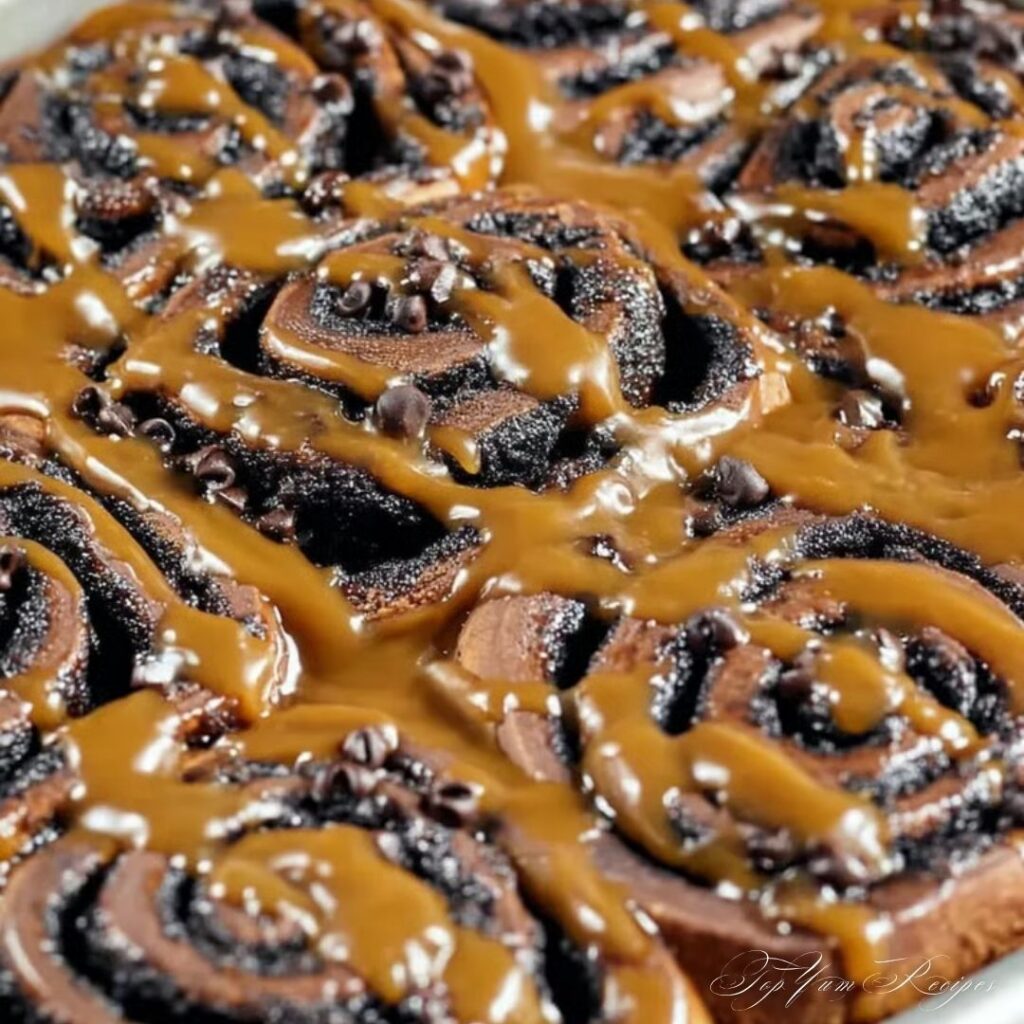
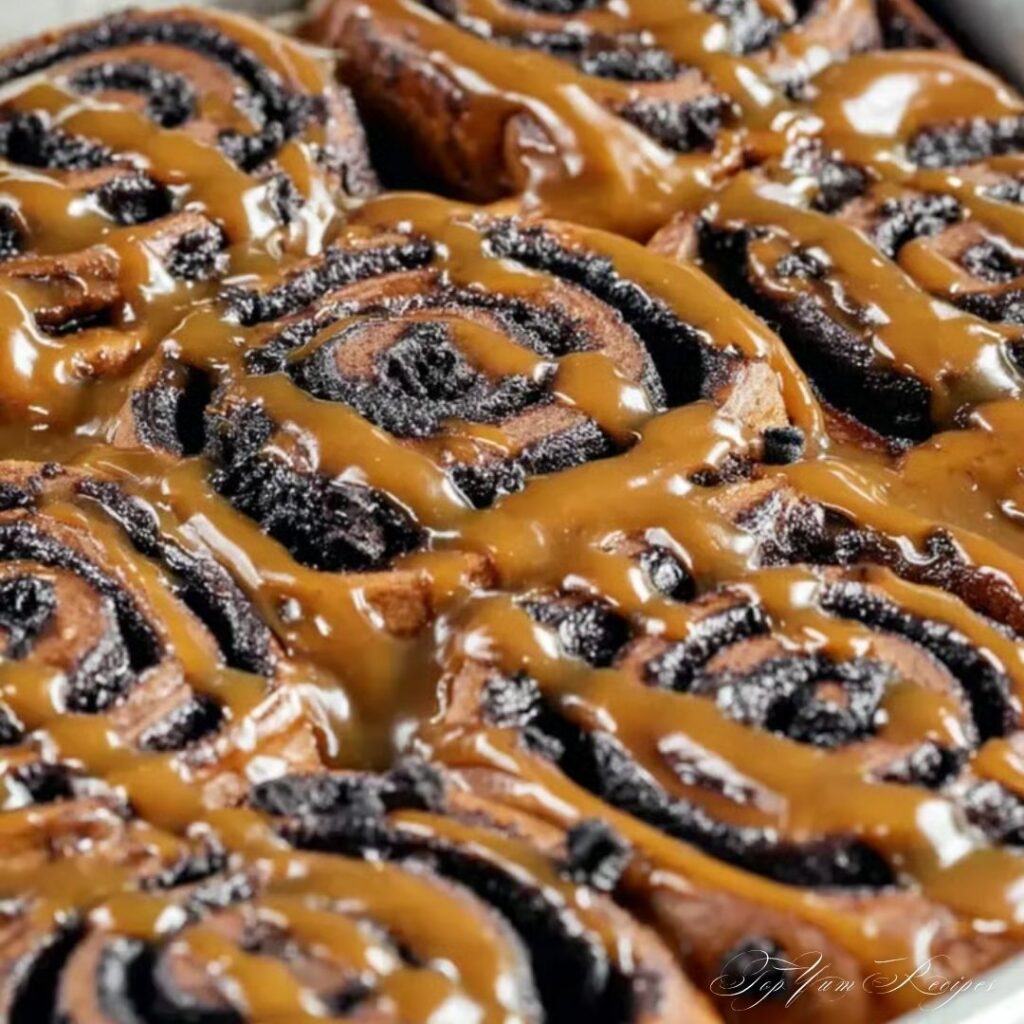
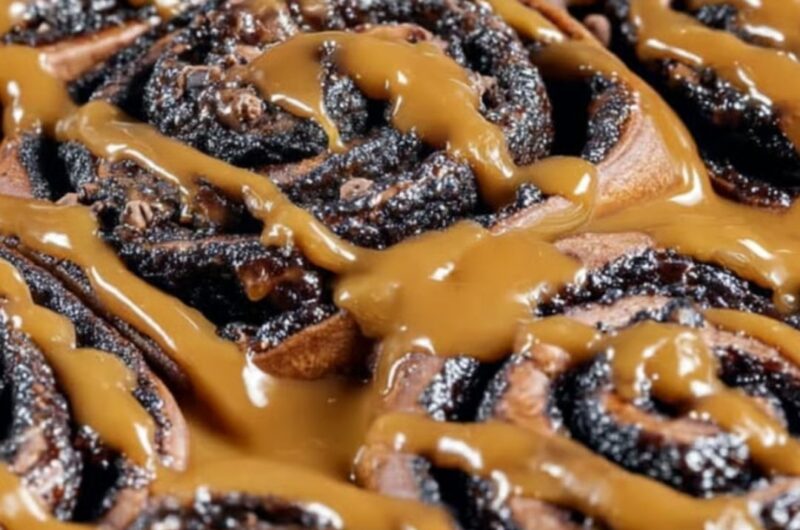
Picture this: you pull a tray of cinnamon rolls from the oven, golden and puffed with ribbons of brown sugar and spice. The air fills with that comforting aroma of cinnamon — and then comes the magic moment. You drizzle a glossy, chocolate glaze over the warm rolls, and it melts into every swirl, pooling softly between the layers.
There’s something special about that combination — chocolate and cinnamon together feel like a warm hug in dessert form. It’s cozy, indulgent, and just a little bit fancy. Whether you bake every weekend or just want to surprise someone with a homemade treat, learning how to make a rich, shiny chocolate cinnamon rolls glaze will instantly take your baking game to bakery level.
This guide walks you through everything — from choosing the right cocoa to getting that perfect glossy finish — so your glaze turns every roll into something unforgettable.
What Makes Chocolate Cinnamon Rolls So Special?
You’ve probably had classic cinnamon rolls before: fluffy, sweet, and coated with vanilla icing. But when you add chocolate into the mix, everything changes.
Chocolate deepens the cinnamon’s warmth and gives the rolls a flavor that feels more like dessert than breakfast. It’s still familiar, but richer — like a cozy upgrade.
A Little History
Cinnamon rolls have been around for centuries, originally from Sweden, where they’re known as kanelbullar. Over time, bakers started experimenting with fillings and toppings — adding nuts, fruit, and yes, chocolate. The chocolate version became especially popular in Europe and North America, where dessert lovers craved something more indulgent.
Today, chocolate-glazed cinnamon rolls are a bakery favorite because they combine two of the world’s best flavors in one bite.
Why the Glaze Matters
A glaze isn’t just decoration — it’s what turns simple rolls into something glossy and irresistible. The perfect chocolate glaze should be:
- Sweet but balanced
- Smooth, not grainy
- Pourable enough to drip, but thick enough to cling
- Shiny, so it looks as good as it tastes
Get those elements right, and your cinnamon rolls will look like they came straight from a high-end bakery.
The Perfect Chocolate Cinnamon Rolls Glaze Recipe
You don’t need anything fancy for this glaze — just pantry staples and a few minutes of your time. Let’s start with what you’ll need.
Ingredients You’ll Need
| Ingredient | Amount | Purpose / Notes |
|---|---|---|
| Unsalted butter | 2 tbsp | Adds richness and creates a silky texture |
| Cocoa powder | 3 tbsp | Brings deep, bold chocolate flavor |
| Powdered sugar | 1 cup | Provides sweetness and a glossy finish |
| Milk or cream | 2–3 tbsp | Controls the thickness and flow |
| Vanilla extract | 1 tsp | Enhances flavor depth |
| Pinch of salt | – | Balances sweetness |
Optional Add-Ons:
- A touch of espresso powder for mocha flavor
- A drizzle of honey for extra sheen
- A bit of orange zest for brightness
These small tweaks let you make the glaze your own.
Step-by-Step Instructions
- Melt the butter over low heat in a small saucepan. Don’t rush this step — gentle heat keeps the texture smooth.
- Whisk in the cocoa powder until the mixture looks dark and lump-free. You should smell that rich chocolate aroma right away.
- Alternate adding powdered sugar and milk, whisking continuously until you reach a glossy, pourable consistency.
- Stir in vanilla extract and a pinch of salt for balance.
- Adjust as needed: add a teaspoon of milk if it’s too thick, or a spoon of sugar if too thin.
- Pour it over warm cinnamon rolls so it melts into the swirls and glistens on top.
Pro Tip:
For the best result, glaze your rolls while they’re still slightly warm — around 10 minutes out of the oven. The heat helps the glaze seep in without sliding off.
Expert Tips for the Best Chocolate Glaze Texture
Even experienced bakers know chocolate glazes can be tricky. Here’s how to make sure yours is perfect every time.
Common Mistakes to Avoid
- Overheating the butter and cocoa: This can cause the glaze to separate or taste burnt.
- Adding cold milk: Always use room temperature or warm milk; cold liquid can make the mixture curdle.
- Skipping the whisk: A fork won’t blend as smoothly — whisking introduces air and shine.
Fixing Texture Problems
- Too thick? Add warm milk, one teaspoon at a time.
- Too thin? Sift in a little more powdered sugar.
- Not shiny enough? Stir in a tiny pat of butter before glazing.
These small adjustments make a huge difference in how your glaze looks and feels.
Flavor Variations and Creative Twists
Once you’ve mastered the basic glaze, you can experiment with endless variations:
- Mocha Glaze: Add ½ teaspoon espresso powder to the cocoa.
- Orange-Chocolate Glaze: Mix in ½ teaspoon orange zest or a drop of orange extract.
- Spicy Chocolate Glaze: Add a pinch of cayenne or chili powder for warmth and depth.
- White Chocolate Drizzle: Layer it on top of the dark glaze for contrast.
Each variation brings a new flavor experience, making your cinnamon rolls perfect for any season or occasion.
Pairing Ideas for Chocolate Cinnamon Rolls
You might think cinnamon rolls don’t need anything extra — but the right pairing can take them to another level.
Perfect Occasions
- Lazy weekend breakfasts
- Holiday brunches
- Valentine’s Day treats
- Bake sales and coffee mornings
Serving Suggestions
- Top with toasted nuts (pecans, hazelnuts, or almonds) for crunch.
- Dust with sea salt flakes for a gourmet touch.
- Serve with a hot cup of coffee, mocha, or spiced chai to complement the cinnamon.
- For dessert, pair with a scoop of vanilla ice cream — the warm glaze melts into the cold cream beautifully.
These small details turn simple rolls into a bakery-worthy centerpiece.
Storage and Make-Ahead Tips
You can make the glaze ahead of time — and yes, it keeps beautifully.
- Fridge: Store in an airtight container for up to 1 week.
- Reheat: Microwave for 10 seconds or place the jar in warm water to loosen.
- Freeze: Pour into a freezer-safe container and keep for up to 3 months. Thaw overnight in the fridge, then whisk to restore texture.
If you’re baking for an event, make the glaze the day before and warm it up right before serving. That way, you save time and still get that freshly made look.
Frequently Asked Questions About Chocolate Cinnamon Rolls Glaze
1. What’s the best chocolate for cinnamon roll glaze?
You can use either unsweetened cocoa powder or dark chocolate chips. Cocoa gives you control over sweetness, while melted chocolate makes the glaze richer.
2. Can I make chocolate cinnamon rolls glaze without powdered sugar?
Yes! You can blend granulated sugar in a blender until it becomes fine, or substitute honey or maple syrup for a natural sweetness.
3. How do I make my chocolate glaze shiny?
Add a small spoon of butter or a drizzle of light corn syrup — both help the glaze stay glossy after cooling.
4. Can I use this glaze on other desserts?
Definitely. This glaze works beautifully on donuts, muffins, bundt cakes, cookies, and even as a drizzle over ice cream or pancakes.
5. My glaze turned grainy — what happened?
That usually means the cocoa didn’t dissolve fully or the butter got too hot. Whisk vigorously over gentle heat until smooth, and always sift your cocoa before using.
Conclusion: Sweet Comfort in Every Drizzle
Every baker knows — it’s the little touches that make something unforgettable. And when you master this chocolate cinnamon rolls glaze, you’re adding more than flavor; you’re adding comfort, beauty, and joy.
Each drizzle brings the scent of cocoa and spice, the sound of soft rolls tearing apart, and that first warm bite that melts on your tongue. Whether you’re baking for yourself, your family, or to share with friends, these rolls turn simple mornings into sweet memories.
So, grab your whisk, melt that butter, and create your own moment of indulgence. Once you taste your homemade chocolate cinnamon rolls glaze, you’ll never want to go back to plain icing again.
Try It, Share It, and Savor It
Now it’s your turn — bake a batch, drizzle that rich glaze, and share your creation with someone you love. Post your masterpiece online or invite a friend for coffee and warm rolls. Because baking isn’t just about food — it’s about moments made a little sweeter.
Irresistible Chocolate Cinnamon Rolls Glaze
Course: Irresistible DessertsCuisine: AmericanDifficulty: Medium9
rolls15
minutes25
minutes40
minutesIngredients
- Chocolate Cinnamon Roll Filling
2/3 cup packed light brown sugar
2 tablespoons black cocoa powder
1 teaspoon ground cinnamon
1/4 cup unsalted butter, softened
- Chocolate Cinnamon Roll Dough
3 1/4 cups all-purpose flour, plus up to 1/2 cup more as needed
1/2 cup unsweetened cocoa powder, sifted
2 teaspoons or 1 packet instant dry yeast
1 teaspoon fine salt
1 teaspoon instant espresso powder or instant coffee
1 cup whole milk
1/2 cup granulated sugar
1/4 cup unsalted butter, at room temperature
1 large egg, at room temperature
- Chocolate Glaze
1 tablespoon unsalted butter, at room temperature
2/3 cup milk or dark chocolate chips
3 tablespoons whole milk
1 cup powdered sugar
1 teaspoon vanilla extract or vanilla bean paste
Directions
- Melt the butter over low heat in a small saucepan. Don’t rush this step — gentle heat keeps the texture smooth.
- Whisk in the cocoa powder until the mixture looks dark and lump-free. You should smell that rich chocolate aroma right away.
- Alternate adding powdered sugar and milk, whisking continuously until you reach a glossy, pourable consistency.
- Stir in vanilla extract and a pinch of salt for balance.
- Adjust as needed: add a teaspoon of milk if it’s too thick, or a spoon of sugar if too thin.
- Pour it over warm cinnamon rolls so it melts into the swirls and glistens on top.
Recipe Video
Notes
- Pro Tip:
For the best result, glaze your rolls while they’re still slightly warm — around 10 minutes out of the oven. The heat helps the glaze seep in without sliding off.