
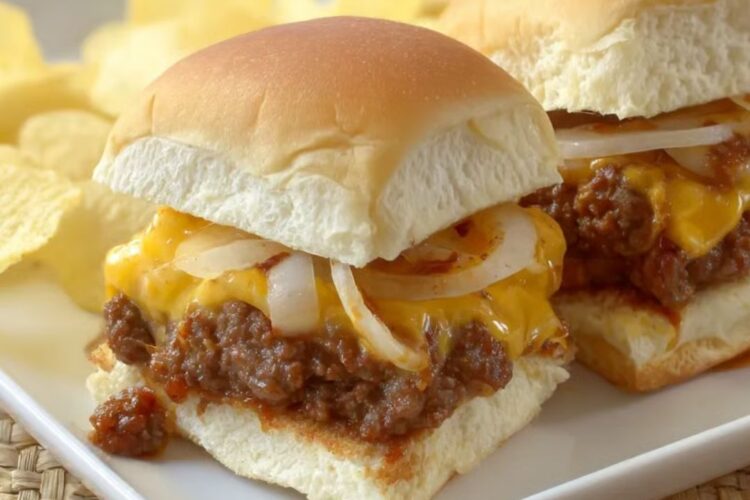
There are certain foods that instantly pull you back to warm evenings, busy kitchens, or the cozy chaos of family gatherings. When you take that first bite of California Chili Cheeseburger Sliders, you feel that mix of nostalgia, comfort, and bold flavor that only real home-style cooking can offer. Maybe it’s the rich chili layered over juicy beef, or the creamy slice of avocado that brings a little West Coast freshness to each bite—whatever it is, these sliders carry that unmistakable California charm.
As you walk through this guide, you’ll not only learn how to make these irresistible sliders but also understand why they’ve become a go-to recipe for game nights, parties, and laid-back weekends. This is more than a recipe—it’s a taste of California comfort you can bring right into your kitchen.
What Makes California Chili Cheeseburger Sliders So Special?
If you’ve ever had a classic cheeseburger slider, you already know how satisfying those little sandwiches can be. But California Chili Cheeseburger Sliders take everything you love and elevate it.
The California Twist
The beauty of these sliders lies in the contrast: warm, smoky chili paired with bright, fresh toppings like avocado and jalapeños. You get juicy beef, melted cheese, and chili—then a burst of cool creaminess that gives each bite a distinct California feel.
Why You’ll Love Them
- They’re small but packed with huge flavor.
- They use simple, accessible ingredients.
- They fit any occasion—from casual dinners to full gatherings.
- They’re a delicious mix of home-style comfort and West Coast brightness.
Ingredients You Need for the Best California Chili Cheeseburger Sliders
Before you start cooking, gather everything you need. These sliders rely on everyday ingredients, but when you combine them the right way, they transform into something bold and memorable.
Slider Ingredients
| Ingredient | Quantity | Notes |
|---|---|---|
| Ground beef (80/20) | 1 lb | Juicy, ideal fat ratio |
| Chili (homemade or canned) | 1 cup | Thick chili works best |
| Slider buns or Hawaiian rolls | 12 | Toasted for texture |
| Cheddar or Pepper Jack cheese | 6 slices | Halved |
| Avocado | 1 sliced | Signature California topping |
| Jalapeños | 1–2 | Optional, fresh or pickled |
| Onion | ½ finely diced | Mix into beef |
| Garlic | 2 cloves | Adds depth |
| Chili powder | 1 tsp | Flavor boost |
| Salt & pepper | To taste | — |
| Butter | 2 tbsp | For toasting |
Ingredient Notes
- The avocado is what gives these sliders their West Coast personality.
- Pepper Jack cheese adds a spicy California kick.
- A thick chili sits better on the sliders and helps prevent soggy buns.
Step-by-Step Guide: How to Make California Chili Cheeseburger Sliders
These sliders may look fancy, but the process is easy enough for busy nights or casual get-togethers.
Step 1 — Prepare the Beef Patties
Mix your ground beef with diced onion, minced garlic, chili powder, salt, and pepper. Divide into small patties slightly larger than your buns—they’ll shrink while cooking.
Sear the patties on a grill or skillet until browned. You don’t have to cook them all the way yet, just enough to develop a flavorful crust.
Step 2 — Warm the Chili
Heat your chili in a small pot. If it’s thin, simmer it longer to thicken. A thicker chili will stay neatly on the slider.
Step 3 — Toast the Buns
Brush your slider buns with melted butter and toast them until golden. This simple step adds a ton of flavor and structure.
Step 4 — Melt the Cheese
Place a half slice of cheese on each patty during the last minute of cooking. Cover the pan to allow the cheese to melt perfectly.
Step 5 — Assemble the Sliders
- Place a cheesy patty on the bottom bun.
- Spoon chili over the patty.
- Add an avocado slice.
- Add jalapeños if you like heat.
- Top with the upper bun.
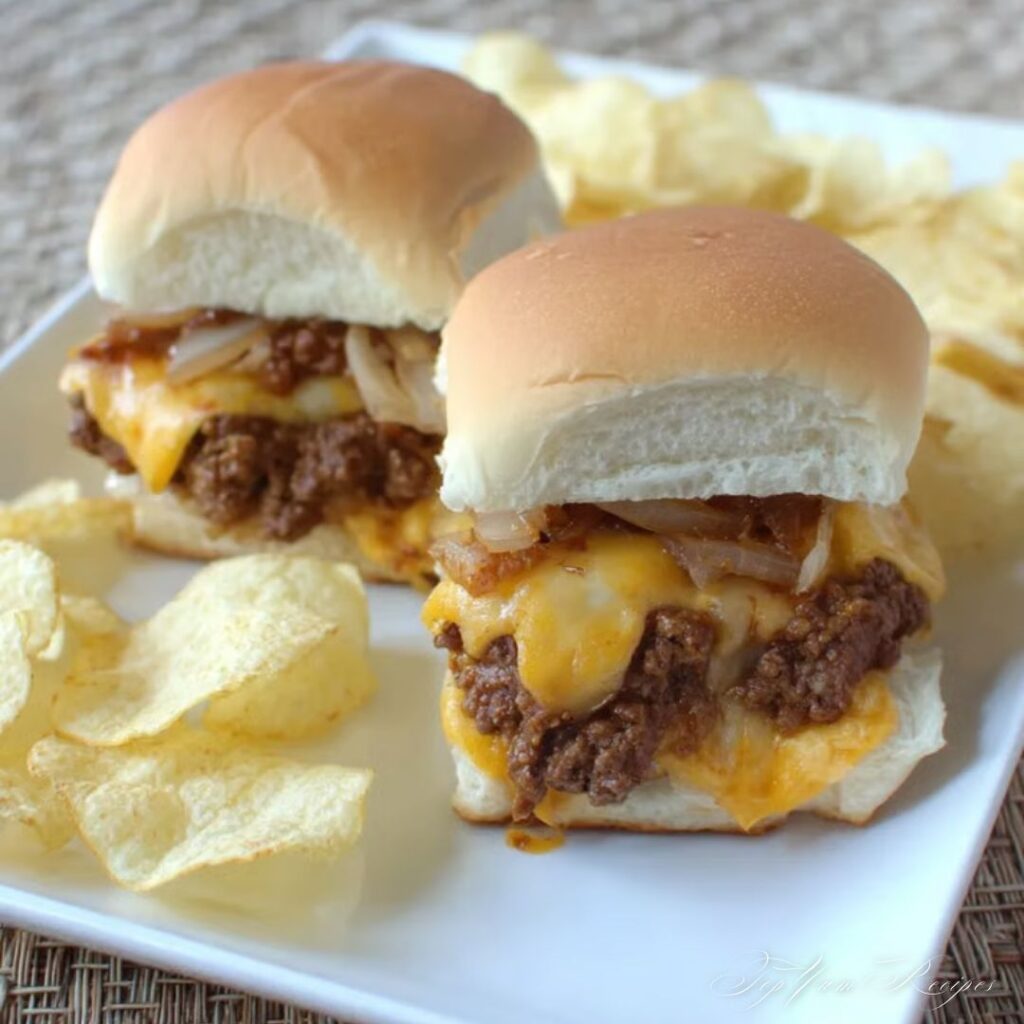
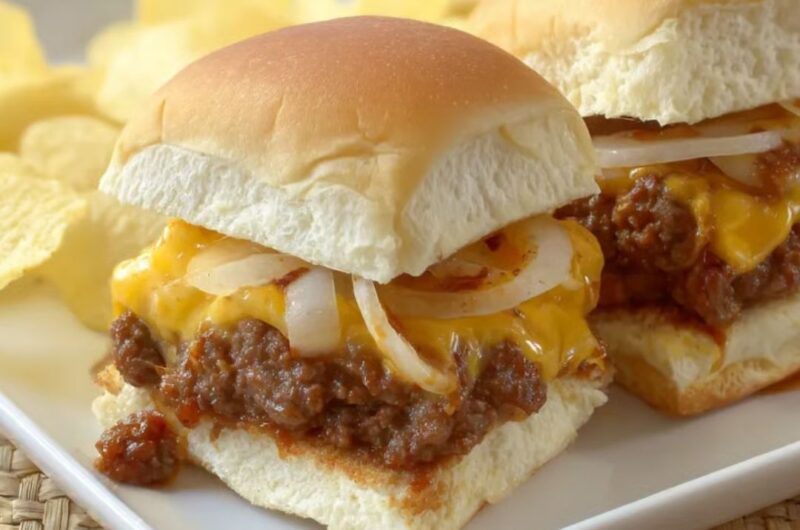
Each slider becomes a warm, creamy, smoky, perfectly sized bite of comfort.
Tips for Maximum Flavor
If you want your sliders to be unforgettable, here are some insider tips:
- Use 80/20 beef for juiciness.
- Don’t skip toasting the buns—this helps them hold up to the chili.
- Steam the cheese for a smooth melt.
- Keep your chili thick so it doesn’t drip.
- Add fresh avocado right before serving to keep it vibrant and creamy.
These little adjustments take your sliders from good to restaurant-level.
Creative Variations of California Chili Cheeseburger Sliders
Once you master the base recipe, feel free to explore creative twists and flavor combinations.
Spicy California Sliders
- Pepper Jack cheese
- Chipotle mayo
- Fresh jalapeños
Great for heat lovers.
Loaded Chili Sliders
- Red onion
- Sour cream
- Crushed tortilla chips
Perfect for game day spreads.
Healthy California Sliders
- Ground turkey
- Light cheese
- Fresh pico de gallo
Lighter but still delicious.
Vegetarian California Sliders
- Plant-based patties
- Black bean chili
- Avocado and fresh salsa
A filling option for non-meat eaters.
How to Serve California Chili Cheeseburger Sliders
Presentation makes a big difference, especially when you’re entertaining.
Serving Tips
- Place the sliders on a large wooden board for a rustic look.
- Use small skewers to keep them stable.
- Add a sprinkle of green onions or cilantro for fresh color.
- Serve with sides like sweet potato fries, coleslaw, or chips.
Best Occasions
These sliders fit almost any event:
- Game nights
- Backyard BBQs
- Family dinners
- Holiday gatherings
- Potlucks
- Birthday parties
They’re easy to carry, quick to eat, and crowd-pleasing.

How to Store & Reheat Your Sliders
Storing
- Keep toppings, patties, and buns separate.
- Refrigerate for 3–4 days.
- Store buns in an airtight bag to keep them soft.
Reheating
- Warm patties in a skillet or air fryer.
- Reheat chili separately so patties stay crisp.
- Toast buns again for best texture.
When reheated properly, your sliders will taste almost as fresh as when you made them.
Nutrition Overview
While exact numbers vary, most California Chili Cheeseburger Sliders fall between 250–350 calories each.
They offer:
- Quality protein from beef
- Healthy fats from avocado
- Plenty of flavor without oversized portions
FAQs About California Chili Cheeseburger Sliders
What makes these sliders different from regular sliders?
The addition of chili, avocado, and jalapeños gives them a signature California-style flavor.
Can you make them ahead of time?
Yes—just keep the components separate and assemble before serving.
What is the best chili to use?
A thick, chunky chili works best so it stays on the slider.
Can the patties be frozen?
Yes. Freeze cooked or uncooked patties for up to three months.
Which cheese works best?
Cheddar is classic, while Pepper Jack adds a spicy California twist.
Conclusion
When you make a tray of California Chili Cheeseburger Sliders, you’re creating more than a meal—you’re offering something warm, comforting, and full of bold flavors. These sliders bring together smoky chili, creamy avocado, juicy beef, and fresh West Coast ingredients in a way that keeps everyone coming back for seconds.
Try the recipe, put your own twist on it, and enjoy a little California comfort right at your table. Whether it’s a family dinner or a party spread, these sliders are going to be a hit.
Call to Action
If you’re excited to try these California Chili Cheeseburger Sliders, share this recipe with someone who loves comfort food. And when you make them, come back and share your favorite variation—or which toppings turned your sliders into a crowd favorite.
California Chili Cheeseburger Sliders: The Ultimate Bite-Sized California Comfort Food
Course: Hearty MainsCuisine: AmericanDifficulty: Medium6
servings15
minutes25
minutes40
minutesIngredients
- Chili
1 pound ground beef chuck (80:20)
1/4 cup finely grated carrot
3 teaspoons chili powder
2 teaspoons paprika
1 teaspoon salt
1 teaspoon black pepper
1 teaspoon granulated sugar
1 tablespoon onion powder
1/2 teaspoon garlic powder
2 cups beef broth
1 teaspoon apple cider vinegar
1 teaspoon Worcestershire sauce
- Roux for Chili
1/4 cup masarepa or masa harina
1/4 cup vegetable oil
- Sliders
1 pound ground beef chuck (80:20)
Salt, as required
Black pepper, as required
6 to 12 King’s Hawaiian rolls
6 to 12 slices American cheese
Thinly sliced onion, optional
Thinly sliced tomato, optional
Yellow mustard, optional
Directions
- Step 1 — Prepare the Beef Patties
Mix your ground beef with diced onion, minced garlic, chili powder, salt, and pepper. Divide into small patties slightly larger than your buns—they’ll shrink while cooking.
Sear the patties on a grill or skillet until browned. You don’t have to cook them all the way yet, just enough to develop a flavorful crust. - Step 2 — Warm the Chili
Heat your chili in a small pot. If it’s thin, simmer it longer to thicken. A thicker chili will stay neatly on the slider. - Step 3 — Toast the Buns
Brush your slider buns with melted butter and toast them until golden. This simple step adds a ton of flavor and structure. - Step 4 — Melt the Cheese
Place a half slice of cheese on each patty during the last minute of cooking. Cover the pan to allow the cheese to melt perfectly. - Step 5 — Assemble the Sliders
Place a cheesy patty on the bottom bun.
Spoon chili over the patty.
Add an avocado slice.
Add jalapeños if you like heat.
Top with the upper bun.
Each slider becomes a warm, creamy, smoky, perfectly sized bite of comfort.
Recipe Video
Notes
- Tips for Maximum Flavor
If you want your sliders to be unforgettable, here are some insider tips:
Use 80/20 beef for juiciness.
Don’t skip toasting the buns—this helps them hold up to the chili.
Steam the cheese for a smooth melt.
Keep your chili thick so it doesn’t drip.
Add fresh avocado right before serving to keep it vibrant and creamy.
These little adjustments take your sliders from good to restaurant-level.