A Sweetly Spooky Beginning
You know that unmistakable feeling when October rolls around — the crisp air, the sound of rustling leaves, and the sight of pumpkins on every porch. There’s something magical about Halloween that turns even simple moments into memories. Maybe it’s the nostalgia of trick-or-treating as a kid or the excitement of dressing up and sharing sweets with friends and family.
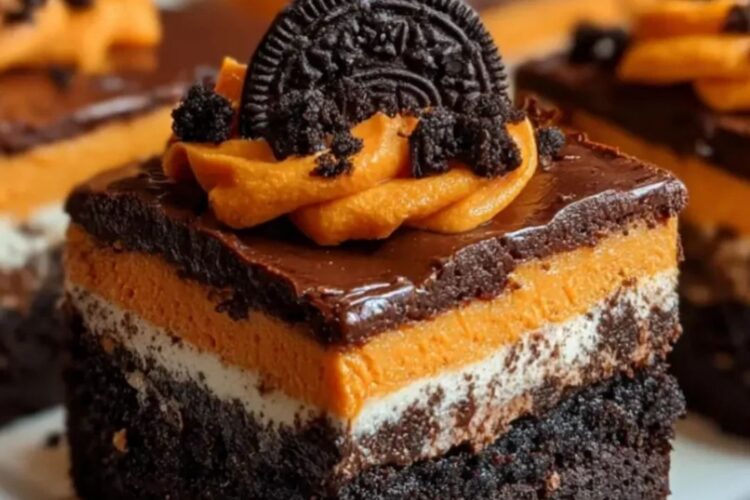
Now imagine capturing that same magic in a dessert — one that layers rich, chocolatey goodness with a creamy Oreo center and a silky chocolate topping. That’s exactly what these Oreo Layered Halloween Brownies deliver. They’re indulgent, festive, and just a little wicked — in the best possible way.
Whether you’re baking for a Halloween party, a movie night, or simply to treat yourself, this recipe gives you a dessert that looks impressive but is surprisingly easy to make. Let’s get you mixing, layering, and sprinkling your way to brownie perfection.
Why You’ll Love These Oreo Layered Halloween Brownies
There are plenty of brownie recipes out there, but this one stands out for a few irresistible reasons:
- Texture heaven: You get a fudgy brownie base, a soft cream cheese Oreo layer, and a glossy chocolate finish — each bite is pure satisfaction.
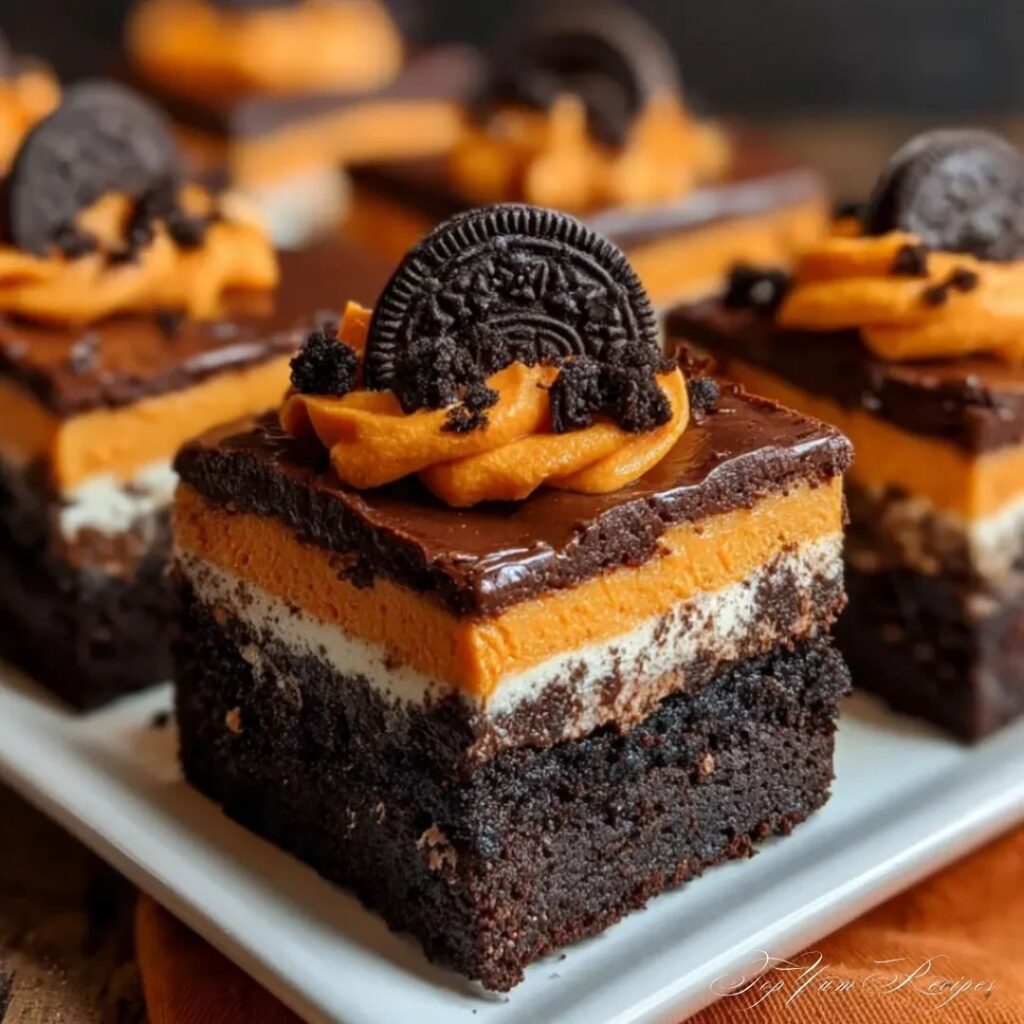
- Halloween flair: The dark chocolate contrasts beautifully with orange sprinkles or Halloween-themed Oreos, making them perfect for spooky celebrations.
- Crowd-pleaser: These brownies are rich, fun to look at, and ideal for parties or potlucks.
- Customizable: You can add candy eyes, gummy worms, or even a touch of pumpkin flavor for a creative twist.
You’re not just making dessert — you’re creating a festive centerpiece that will have everyone reaching for seconds.
Ingredients You’ll Need for Oreo Layered Halloween Brownies
Before you start, gather your ingredients so you can bake without interruptions. Here’s what you’ll need:
Ingredient Table
| Layer | Ingredients | Amount |
|---|---|---|
| Brownie Base | All-purpose flour | 1 cup |
| Cocoa powder | ½ cup | |
| Sugar | 1 cup | |
| Melted butter | ½ cup | |
| Eggs | 2 large | |
| Vanilla extract | 1 tsp | |
| Oreo Layer | Cream cheese (softened) | 8 oz |
| Powdered sugar | ½ cup | |
| Crushed Oreo cookies | 10–12 | |
| Chocolate Topping | Semi-sweet chocolate chips | 1 cup |
| Heavy cream | ½ cup | |
| Halloween sprinkles (optional) | As desired |
Ingredient Notes
- Oreo options: Use Halloween Oreos with orange filling for a colorful pop.
- Texture tip: Crush your Oreos roughly — you want chunks, not dust.
- Substitutions: Swap in gluten-free flour or dairy-free cream cheese if needed.
- Flavor idea: A touch of espresso powder in the brownie base enhances the chocolate flavor beautifully.
Step-by-Step Guide to Making Oreo Layered Halloween Brownies
Step 1: Prepare the Brownie Base
- Preheat your oven to 350°F (175°C). Grease or line a 9×9-inch baking pan with parchment paper.
- In a large bowl, whisk together the flour, cocoa powder, and sugar.
- Add the melted butter, eggs, and vanilla extract. Stir until smooth and thick.
- Pour the batter into your prepared pan and spread it evenly.
- Bake for 20–25 minutes or until a toothpick comes out with a few moist crumbs.
Pro Tip: Don’t overbake! A slightly underdone brownie base keeps that signature fudgy texture.
Step 2: Create the Oreo Layer
While the brownie base cools, start on the creamy middle layer.
- In a mixing bowl, beat the softened cream cheese until smooth.
- Add the powdered sugar and continue beating until fully combined.
- Gently fold in the crushed Oreo cookies.
- Once your brownies are cool, spread this mixture evenly across the surface.
You’ll instantly see the magic happen — those dark Oreo chunks against the creamy filling create the perfect Halloween contrast.
Step 3: Add the Chocolate Topping
Now for the finishing touch — the glossy chocolate layer that ties everything together.
- In a small saucepan or microwave-safe bowl, heat the heavy cream until it just begins to simmer.
- Pour it over the chocolate chips and let it sit for about a minute.
- Stir until smooth and shiny.
- Pour this luscious ganache over the Oreo layer, spreading it gently with a spatula.
- Decorate with Halloween sprinkles, candy eyes, or crushed Oreos while it’s still wet.
Once you chill it, this top layer will firm up into a smooth, irresistible shell of chocolate.
Step 4: Chill and Serve
Pop the pan into the refrigerator for at least 1–2 hours. This step helps the layers set beautifully, making it easier to cut clean squares later.
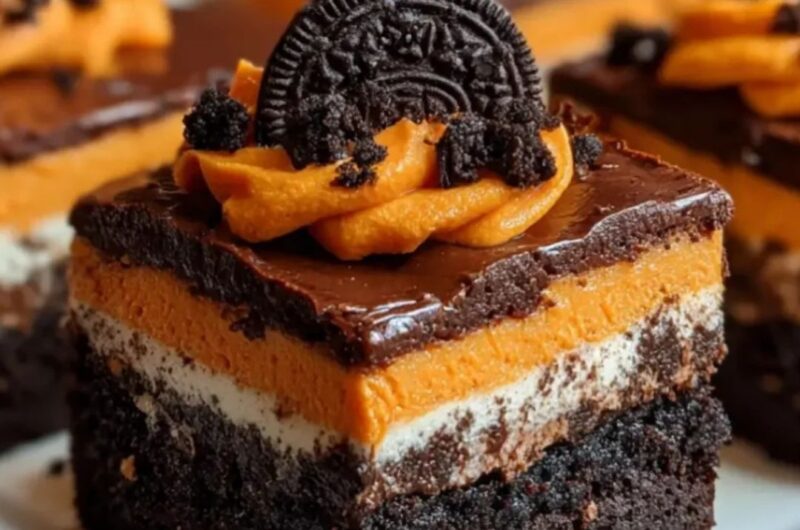
When ready, slice into squares or rectangles. Each piece will reveal those stunning, distinct layers — a dark brownie base, speckled Oreo cream center, and glossy chocolate top.
Serve chilled for the best texture, or slightly warmed with a scoop of vanilla ice cream for an over-the-top treat.
Creative Variations for Your Halloween Brownies
Once you master the classic version, you can experiment with fun, spooky twists:
- Monster Mash Brownies: Add candy eyes and gummy worms on top for a creepy-crawly effect.
- Pumpkin Oreo Layer: Mix a few tablespoons of pumpkin puree into your cream cheese layer and sprinkle cinnamon for fall flavor.
- Red Velvet Surprise: Replace some cocoa powder with red velvet cake mix and drizzle raspberry syrup for a “bloody” twist.
- Mini Brownie Bites: Use muffin tins for individual portions — great for party trays or lunchbox treats.
Each version gives you a fresh way to make Halloween desserts more memorable.
Tips for Perfectly Layered Oreo Halloween Brownies
Getting those bakery-style layers is easier than you think — you just need a few insider tips:
- Cool completely before layering. If the brownie base is even slightly warm, the cream cheese will melt.
- Use an offset spatula. It makes spreading layers evenly so much simpler.
- Chill before cutting. You’ll get those sharp, professional-looking layers without smudging.
- Store smart. Keep them in an airtight container in the fridge for up to 5 days — they actually taste better the next day!
- Presentation counts. Dust a little cocoa powder or drizzle extra chocolate for a bakery finish.
These small steps make a big difference in how your Oreo Layered Halloween Brownies look and taste.
How to Store and Serve Your Oreo Layered Halloween Brownies
Storage Tips
- Room temperature: Safe for up to 6 hours during a party.
- Refrigerated: Keeps fresh and firm for up to 5 days.
- Frozen: Wrap each square in parchment, place in a freezer-safe bag, and store for up to 3 months.
Serving Ideas
- Warm them briefly in the microwave and top with whipped cream or ice cream.
- Add a drizzle of caramel or chocolate sauce for extra decadence.
- Serve on a Halloween platter surrounded by candy corn for that spooky vibe.
These brownies aren’t just dessert — they’re a visual showstopper that fits right into your Halloween celebration.
Frequently Asked Questions About Oreo Layered Halloween Brownies
Can I use a boxed brownie mix instead of homemade?
Yes, you can! If you’re short on time, go ahead and use your favorite boxed mix. Just choose a fudgy version — it gives the best base for layering.
Can I make Oreo layered brownies ahead of time?
Absolutely. In fact, they taste even better after a night in the fridge because the layers firm up and the flavors meld beautifully.
How can I make my brownies look more festive for Halloween?
Use colored candy melts, edible glitter, or Halloween-themed Oreos with orange filling. You can even pipe white chocolate lines to create “mummy brownies.”
Can I add extra toppings?
Definitely. Crushed candy bars, peanut butter drizzle, or crushed pretzels can all add exciting textures and flavors.
Are Oreo layered brownies good for kids to help make?
Yes! Kids love helping with the mixing and decorating steps. Just handle the baking and ganache melting yourself — the rest is a family-friendly activity.
Conclusion: A Sweet Spell for Halloween Nights
Halloween isn’t just about costumes or candy — it’s about moments that make you smile. And when you pull a tray of these Oreo Layered Halloween Brownies from the fridge, you’ll feel that spark of joy that only comes from creating something special.
Each layer tells its own story: the dark, fudgy base captures the essence of indulgence; the Oreo cream layer adds a playful crunch; and the glossy chocolate topping brings it all together in sweet harmony.
So this year, skip the store-bought sweets and treat yourself — and your loved ones — to a dessert that’s both spooky and spectacular. Whip up a batch, snap a photo of your creation, and share your Halloween magic with the world.
Because sometimes, the most hauntingly delicious memories start right in your kitchen.
🎃 Love this recipe? Share it with your baking friends or post your own version on social media with the hashtag #OreoHalloweenBrownies. Don’t forget to sign up for our baking newsletter for more creative, seasonal desserts that bring joy to your kitchen all year long.
Oreo Layered Halloween Brownies
Course: Irresistible DessertsCuisine: AmericanDifficulty: Easy12
servings20
minutes33
minutes53
minutesIngredients
- Brownie Base
All-purpose flour 1 cup
Cocoa powder ½ cup
Sugar 1 cup
Melted butter ½ cup
Eggs 2 large
Vanilla extract 1 tsp
- Oreo Layer
Cream cheese (softened) 8 oz
Powdered sugar ½ cup
Crushed Oreo cookies 10–12
- Chocolate Topping
Semi-sweet chocolate chips 1 cup
Heavy cream ½ cup
Halloween sprinkles (optional) As desired
Directions
- Step 1: Prepare the Brownie Base
Preheat your oven to 350°F (175°C). Grease or line a 9×9-inch baking pan with parchment paper.
In a large bowl, whisk together the flour, cocoa powder, and sugar.
Add the melted butter, eggs, and vanilla extract. Stir until smooth and thick.
Pour the batter into your prepared pan and spread it evenly.
Bake for 20–25 minutes or until a toothpick comes out with a few moist crumbs.
Pro Tip: Don’t overbake! A slightly underdone brownie base keeps that signature fudgy texture. - Step 2: Create the Oreo Layer
While the brownie base cools, start on the creamy middle layer.
In a mixing bowl, beat the softened cream cheese until smooth.
Add the powdered sugar and continue beating until fully combined.
Gently fold in the crushed Oreo cookies.
Once your brownies are cool, spread this mixture evenly across the surface.
You’ll instantly see the magic happen — those dark Oreo chunks against the creamy filling create the perfect Halloween contrast. - Step 3: Add the Chocolate Topping
Now for the finishing touch — the glossy chocolate layer that ties everything together.
In a small saucepan or microwave-safe bowl, heat the heavy cream until it just begins to simmer.
Pour it over the chocolate chips and let it sit for about a minute.
Stir until smooth and shiny.
Pour this luscious ganache over the Oreo layer, spreading it gently with a spatula.
Decorate with Halloween sprinkles, candy eyes, or crushed Oreos while it’s still wet.
Once you chill it, this top layer will firm up into a smooth, irresistible shell of chocolate. - Step 4: Chill and Serve
Pop the pan into the refrigerator for at least 1–2 hours. This step helps the layers set beautifully, making it easier to cut clean squares later.
When ready, slice into squares or rectangles. Each piece will reveal those stunning, distinct layers — a dark brownie base, speckled Oreo cream center, and glossy chocolate top.
Serve chilled for the best texture, or slightly warmed with a scoop of vanilla ice cream for an over-the-top treat.
Recipe Video
Notes
- Tips for Perfectly Layered Oreo Halloween Brownies
Getting those bakery-style layers is easier than you think — you just need a few insider tips:
Cool completely before layering. If the brownie base is even slightly warm, the cream cheese will melt.
Use an offset spatula. It makes spreading layers evenly so much simpler.
Chill before cutting. You’ll get those sharp, professional-looking layers without smudging.
Store smart. Keep them in an airtight container in the fridge for up to 5 days — they actually taste better the next day!
Presentation counts. Dust a little cocoa powder or drizzle extra chocolate for a bakery finish.
These small steps make a big difference in how your Oreo Layered Halloween Brownies look and taste.