
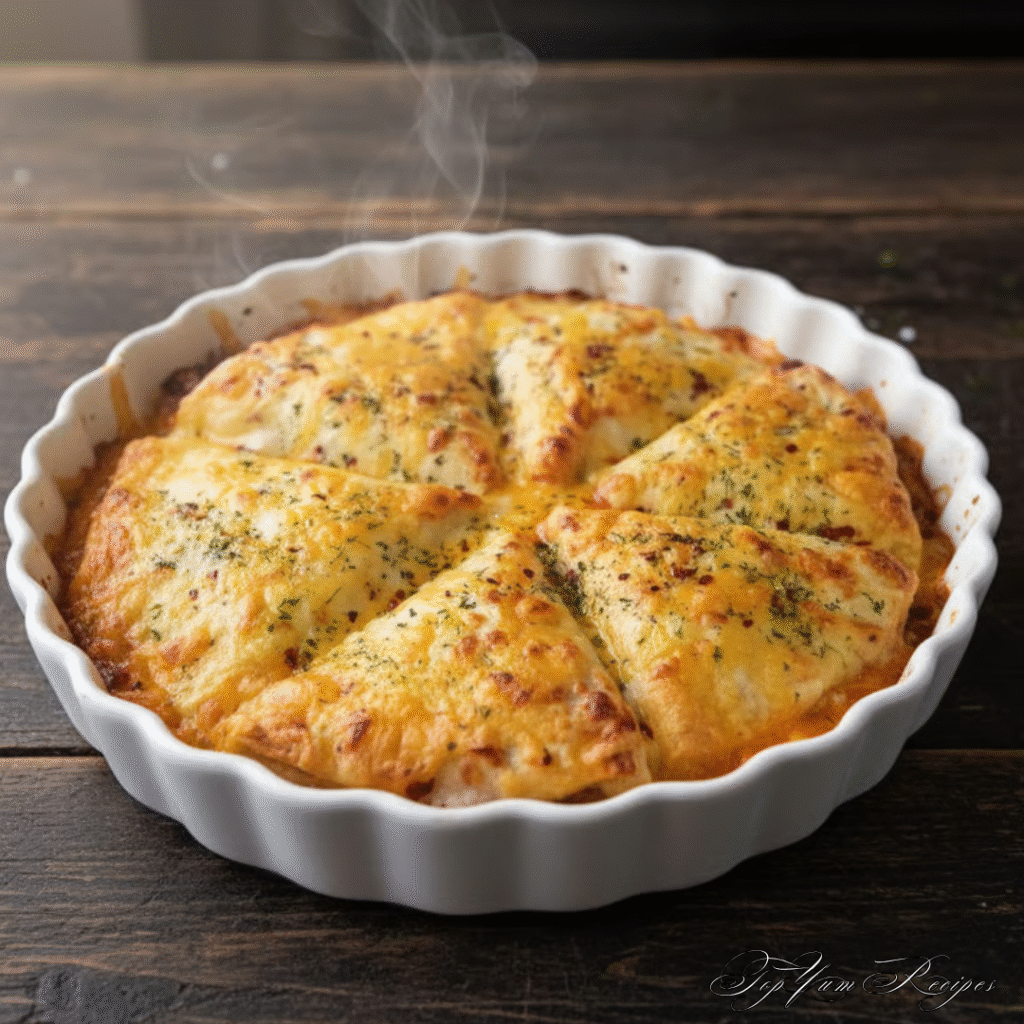
Picture this: you come home after a long day, stomach rumbling, and you want something warm, satisfying, and packed with flavor that doesn’t require hours in the kitchen. That’s exactly where Cheesy Beef Pockets Delight comes in. These golden, crispy pockets stuffed with seasoned beef and gooey melted cheese hit every craving you have for comfort food.
You’ll love how the outside gives a satisfying crunch while the inside delivers stretchy cheese and savory beef in every single bite. Whether you’re feeding picky kids, entertaining friends, or simply treating yourself on a busy weeknight, this recipe delivers big results with minimal effort. In the next sections, you’ll discover everything you need to create your own Cheesy Beef Pockets Delight at home, along with tips to make them perfect every time.
Why Cheesy Beef Pockets Delight Deserves a Spot in Your Weekly Rotation
You know those meals that feel like a hug on a plate? This is one of them. Cheesy Beef Pockets Delight combines the best parts of tacos, quesadillas, and handheld pies into one irresistible package.
These pockets stand out because they’re incredibly versatile. You can bake them for a lighter crunch or air fry them for extra crispiness. They work beautifully for lunchboxes, game day snacks, or quick family dinners. Best of all, you can prepare them ahead of time and simply reheat when hunger strikes.
Many home cooks turn to this recipe when they need something fast yet filling. With about 15 minutes of prep and 20 minutes of cooking, you can have dinner on the table in under 40 minutes. That kind of speed matters when life gets hectic.
What Makes Cheesy Beef Pockets Delight So Special
At its heart, Cheesy Beef Pockets Delight features seasoned ground beef mixed with aromatic vegetables and generous amounts of shredded cheese, all wrapped in soft tortillas that crisp up beautifully in the oven.
The magic happens in the contrast of textures and flavors. The beef brings hearty, savory depth while the cheese provides that irresistible pull when you take a bite. Many people describe the experience as similar to a gourmet Hot Pocket, but fresher, tastier, and fully customizable to your preferences.
You control the spice level, the types of cheese, and even the wrapper. Some versions use puff pastry for a flakier result, while others stick with flour tortillas for simplicity. Either way, you end up with something that feels indulgent without complicated techniques.
Ingredients You’ll Need for Cheesy Beef Pockets Delight
Gathering the right ingredients sets you up for success. Here’s everything you need for a batch that serves 4-6 people (about 8-12 pockets depending on size).
Complete Ingredients Table
| Ingredient | Quantity | Notes / Substitutions |
|---|---|---|
| Ground Beef | 1 lb (450g) | 80/20 for flavor, or leaner for lighter version |
| Onion | 1 medium, finely diced | Yellow or white works best |
| Bell Pepper | 1 cup, diced | Red or green for color and sweetness |
| Garlic | 3 cloves, minced | Fresh is always better |
| Taco Seasoning | 1 packet (or homemade) | Adjust to taste |
| Shredded Cheese | 2 cups | Mix of cheddar and mozzarella recommended |
| Large Flour Tortillas | 8-10 | Burrito size for bigger pockets |
| Butter or Oil | 3 tbsp | For brushing and sautéing |
| Optional: Jalapeños | 1-2, diced | For extra heat |
| Optional: Black Beans | ½ cup | Adds fiber and texture |
This combination creates a balanced filling that isn’t too wet or dry. You can easily swap ingredients based on what you have in your pantry.
Step-by-Step Guide to Making Your Own Cheesy Beef Pockets Delight
You’ll find the process straightforward and forgiving, even if you’re not a confident cook.
1. Prepare the Savory Beef Filling
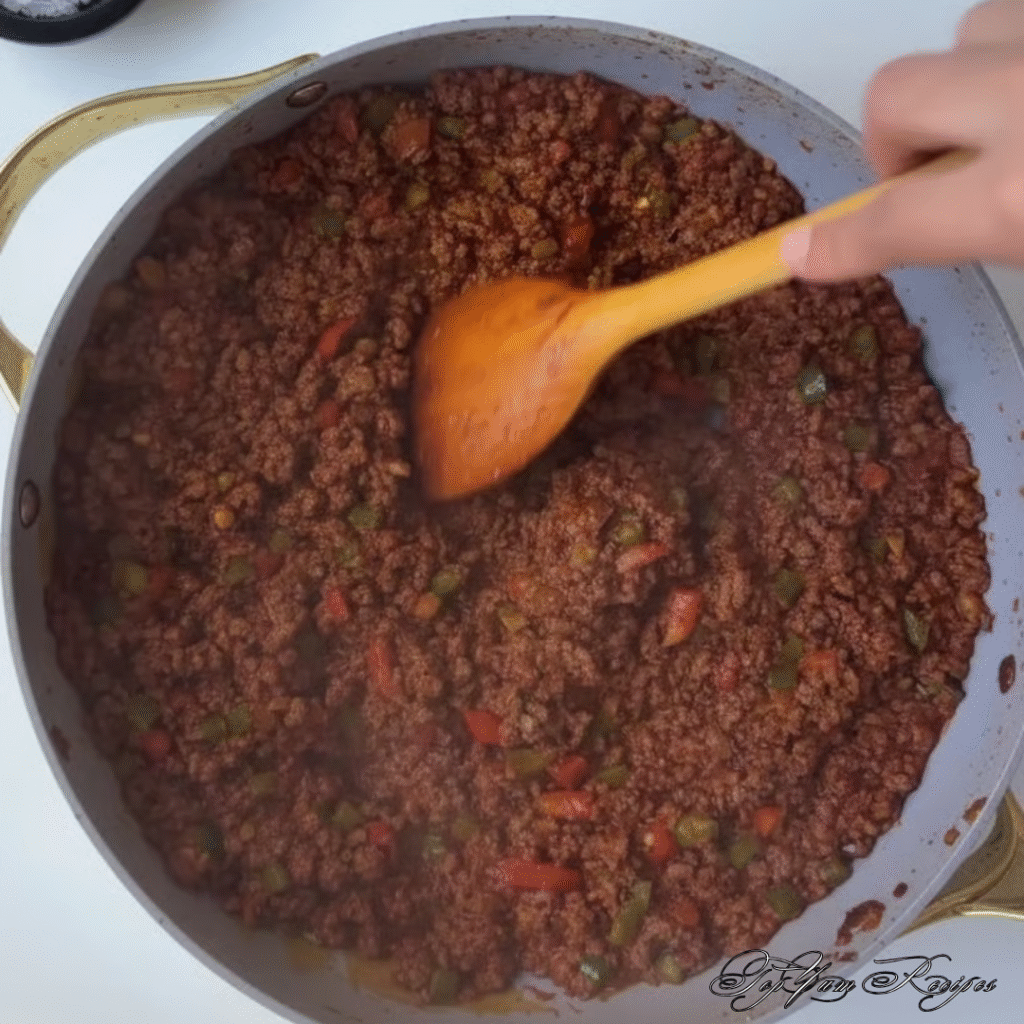
Start by heating 1 tablespoon of oil in a large skillet over medium heat. Add your diced onion and cook for 2-3 minutes until it softens and turns translucent. Toss in the minced garlic and diced bell pepper, stirring for another minute until fragrant.
Add the ground beef and break it up with a wooden spoon. Cook until no pink remains, about 5-7 minutes. Drain any excess fat if needed. Sprinkle in the taco seasoning along with a splash of water (about ⅓ cup) to help everything come together. Let it simmer for 3-4 minutes so the flavors meld beautifully. Remove from heat and allow the mixture to cool slightly before assembling. This step prevents the cheese from melting too early.
2. Assemble the Pockets
Preheat your oven to 400°F (200°C). While it heats, prepare your tortillas. Some cooks cut large tortillas in half for triangle shapes, while others use whole ones for bigger pockets.
Spread a thin layer of cheese on one half of the tortilla. Add 2-3 generous spoonfuls of the beef mixture, then top with more cheese. Fold the tortilla over and press the edges firmly to seal. You can use a fork to crimp the edges for better closure. Brush the tops with melted butter or oil for that gorgeous golden color.
3. Bake to Crispy Perfection
Arrange the pockets on a baking sheet lined with parchment paper. Bake for 15-20 minutes, flipping halfway through if you want even browning on both sides. They’re ready when the tortillas turn deep golden and the cheese inside becomes bubbly.
For an even crispier result, try air frying at 375°F for 8-12 minutes. The circulating hot air creates restaurant-quality crunch without extra oil.
Pro Tips to Elevate Your Cheesy Beef Pockets Delight
You can take this recipe from good to unforgettable with a few smart techniques.
- Prevent Leaking: Don’t overfill the pockets. Leave enough room around the edges so you can seal them properly. A little shredded cheese along the seam acts as natural “glue” when it melts.
- Boost the Flavor: Add a tablespoon of cream cheese to the beef mixture for extra creaminess. Or mix in some corn, black beans, or diced jalapeños for different textures.
- Cheese Matters: A blend of sharp cheddar for flavor and mozzarella for stretch works wonderfully. Pepper Jack adds a nice kick if you enjoy heat.
- Make-Ahead Magic: Assemble the pockets completely, place them on a tray, and freeze until solid. Transfer to a freezer bag and store for up to two months. Bake straight from frozen, adding a few extra minutes to the cooking time.
These small adjustments help you create pockets that taste like you spent hours in the kitchen when you really didn’t.
Creative Variations to Keep Things Exciting
One of the best things about Cheesy Beef Pockets Delight is how easily you can change it up.
Spicy Southwest Version: Add chopped jalapeños, a dash of hot sauce, and use Pepper Jack cheese. Serve with fresh salsa and sour cream on the side.
Italian-Inspired Twist: Swap taco seasoning for Italian herbs, add a spoonful of marinara sauce to the beef, and use mozzarella with a sprinkle of Parmesan.
Breakfast Style: Incorporate scrambled eggs and breakfast sausage instead of taco-seasoned beef. These make fantastic grab-and-go morning meals.
Low-Carb Option: Use low-carb tortillas or even large lettuce leaves for wrapping if you want to reduce carbs.
Puff Pastry Version: For special occasions, use thawed puff pastry sheets. The result is flakier and more elegant, perfect for parties.
Feel free to experiment with whatever ingredients you love. The basic method stays the same while the fillings adapt to your mood or pantry.
Smart Serving Ideas and Pairings
You can serve Cheesy Beef Pockets Delight in many delicious ways.
Pair them with classic sides like Mexican rice, refried beans, or a fresh green salad with lime dressing. For dipping, offer sour cream, guacamole, salsa, or even queso dip. Kids particularly enjoy ranch dressing as a fun option.
For drinks, try horchata, iced tea with lemon, or a light Mexican lager if you’re serving adults. These pockets also work beautifully as appetizers at gatherings. Simply cut them into smaller triangles after baking.
Understanding the Nutrition in Cheesy Beef Pockets Delight
Each pocket delivers solid protein from the beef and calcium from the cheese. A typical serving (two pockets) contains roughly 350-450 calories, depending on exact ingredients and portion sizes.
You get a good balance of protein (around 20g per serving), carbohydrates from the tortilla, and fats that make the meal satisfying. If you want a lighter version, choose 90% lean beef, reduce the cheese slightly, and load up on vegetables in the filling.
Remember that homemade versions usually taste better and contain fewer additives than frozen store-bought alternatives.
Common Questions About Making Cheesy Beef Pockets Delight
How long do Cheesy Beef Pockets Delight last in the fridge?
You can store assembled and baked pockets in an airtight container for up to 4 days. Reheat in the oven or air fryer to restore crispiness.
Can you freeze Cheesy Beef Pockets Delight?
Absolutely. Freeze them before or after baking. They reheat wonderfully and make meal prep a breeze.
What’s the best cheese combination for Cheesy Beef Pockets Delight?
Most people love mixing cheddar for sharp flavor with mozzarella for that perfect melt and stretch. Colby Jack also works beautifully.
Are Cheesy Beef Pockets Delight suitable for kids?
Yes! They’re handheld, fun to eat, and you can easily tone down the spices for younger palates. Many children ask for them repeatedly.
Can I make a vegetarian version of Cheesy Beef Pockets Delight?
Definitely. Replace the beef with black beans, lentils, or plant-based crumbles seasoned the same way. The result still tastes rich and satisfying.
Final Thoughts: Time to Create Your Own Cheesy Beef Pockets Delight
You now have everything you need to bring this comforting, crowd-pleasing recipe to your table. Cheesy Beef Pockets Delight proves that delicious meals don’t need to be complicated or time-consuming. With simple ingredients and straightforward steps, you can create something your whole family will look forward to.
The next time you need a reliable dinner solution that feels special, give these pockets a try. They deliver on flavor, texture, and convenience every single time.
What are you waiting for? Head to your kitchen, gather those ingredients, and treat yourself and your loved ones to homemade Cheesy Beef Pockets Delight tonight. Once you try them, they’ll likely become a regular request in your household.
Drop a comment below and let everyone know how your version turned out. Did you add any special twists? Share your favorite dipping sauce or side dish pairing. Your ideas might inspire someone else to get creative in their kitchen too.

Cheesy Beef Pockets Delight: Your New Go-To Comfort Meal
Course: Dinner DelightsCuisine: AmericanDifficulty: Easy4
servings15
minutes20
minutes35
minutesIngredients
Ground Beef
1 lb (450g)
80/20 for flavor, or leaner for lighter versionOnion
1 medium, finely diced
Yellow or white works bestBell Pepper
1 cup, diced
Red or green for color and sweetnessGarlic
3 cloves, minced
Fresh is always betterTaco Seasoning
1 packet (or homemade)
Adjust to tasteShredded Cheese
2 cups
Mix of cheddar and mozzarella recommendedLarge Flour Tortillas
8-10
Burrito size for bigger pocketsButter or Oil
3 tbsp
For brushing and sautéingOptional: Jalapeños
1-2, diced
For extra heatOptional: Black Beans
½ cup
Adds fiber and texture
Directions
- 1. Prepare the Savory Beef Filling
Start by heating 1 tablespoon of oil in a large skillet over medium heat. Add your diced onion and cook for 2-3 minutes until it softens and turns translucent. Toss in the minced garlic and diced bell pepper, stirring for another minute until fragrant.
Add the ground beef and break it up with a wooden spoon. Cook until no pink remains, about 5-7 minutes. Drain any excess fat if needed. Sprinkle in the taco seasoning along with a splash of water (about ⅓ cup) to help everything come together. Let it simmer for 3-4 minutes so the flavors meld beautifully. Remove from heat and allow the mixture to cool slightly before assembling. This step prevents the cheese from melting too early. - 2. Assemble the Pockets
Preheat your oven to 400°F (200°C). While it heats, prepare your tortillas. Some cooks cut large tortillas in half for triangle shapes, while others use whole ones for bigger pockets.
Spread a thin layer of cheese on one half of the tortilla. Add 2-3 generous spoonfuls of the beef mixture, then top with more cheese. Fold the tortilla over and press the edges firmly to seal. You can use a fork to crimp the edges for better closure. Brush the tops with melted butter or oil for that gorgeous golden color. - 3. Bake to Crispy Perfection
Arrange the pockets on a baking sheet lined with parchment paper. Bake for 15-20 minutes, flipping halfway through if you want even browning on both sides. They’re ready when the tortillas turn deep golden and the cheese inside becomes bubbly.
For an even crispier result, try air frying at 375°F for 8-12 minutes. The circulating hot air creates restaurant-quality crunch without extra oil.
Notes
- You can take this recipe from good to unforgettable with a few smart techniques.
Prevent Leaking: Don’t overfill the pockets. Leave enough room around the edges so you can seal them properly. A little shredded cheese along the seam acts as natural “glue” when it melts.
Boost the Flavor: Add a tablespoon of cream cheese to the beef mixture for extra creaminess. Or mix in some corn, black beans, or diced jalapeños for different textures.
Cheese Matters: A blend of sharp cheddar for flavor and mozzarella for stretch works wonderfully. Pepper Jack adds a nice kick if you enjoy heat.
Make-Ahead Magic: Assemble the pockets completely, place them on a tray, and freeze until solid. Transfer to a freezer bag and store for up to two months. Bake straight from frozen, adding a few extra minutes to the cooking time.