There’s something deeply comforting about making your own pie crust. Maybe it’s the way cold butter hits the flour and turns into soft, golden layers, or maybe it’s knowing that this simple dough holds the secret to every perfect pie you’ve ever loved.
If you’ve ever struggled with tough or soggy crusts, don’t worry — you’re not alone. The truth is, making a flaky homemade pie crust isn’t complicated once you understand the “why” behind each step. Once you do, it’ll feel like second nature, and you’ll never go back to store-bought again.
In this guide, you’ll learn exactly how to make a pie crust that’s buttery, crisp, and full of flaky layers — just like the ones from your favorite bakery.
Why Making Your Own Pie Crust Is Worth It
You might be wondering if homemade pie crust is really worth the extra effort. The answer is a big yes — and here’s why:
- You control the ingredients. No preservatives or hidden additives — just butter, flour, salt, and water.
- It tastes better. Store-bought crusts can’t match the rich flavor and flaky texture of homemade.
- It feels rewarding. There’s a quiet joy in mastering something that looks tricky but isn’t.
- It’s customizable. You can tweak it for sweet or savory pies, adjust thickness, or even add spices or herbs.
And once you’ve nailed it, you’ll wonder why you ever bought one in a box.
The Secret to a Flaky Homemade Pie Crust
Understanding What Makes a Crust Flaky
Flakiness comes down to science — and a little patience. When you combine cold butter with flour and bake it, the butter melts in the oven and creates steam pockets. Those pockets are what form the delicate layers you love.
If the butter melts too early (before baking), the crust turns dense instead of light. That’s why temperature and handling are so important.
Choosing the Right Ingredients
The ingredients are simple, but each plays a role. Here’s a breakdown:
| Ingredient | Purpose | Tips |
|---|---|---|
| All-purpose flour | Provides structure | Use unbleached flour for the best texture |
| Unsalted butter | Adds flavor and creates flakes | Keep it cold; don’t overmix |
| Ice water | Helps bind dough | Add gradually until dough just holds together |
| Salt | Enhances flavor | Don’t skip — it balances sweetness too |
| (Optional) Vinegar or vodka | Prevents over-glutenization | Keeps dough tender and easy to roll |
If you want a rich, bakery-style crust, butter is non-negotiable. But you can blend in a bit of shortening or lard for extra flakiness if you like.
Step-by-Step: How to Make Flaky Homemade Pie Crust
Here’s the part you’ve been waiting for — the full process, made easy.
Step 1 – Keep Everything Cold
Start by chilling your butter, mixing bowl, and even your flour if your kitchen is warm. Cold ingredients mean your butter stays solid until baking, which is the key to those beautiful flakes.
Tip: Work quickly, and if your dough starts feeling warm or sticky, pop it back in the fridge for a few minutes.
Step 2 – Mix the Dough Properly
In a large bowl, whisk together flour and salt. Add the cold butter cubes and use a pastry cutter or your fingertips to “cut” the butter into the flour until it looks like coarse crumbs with a few pea-sized chunks.
Those small butter pieces are what create texture later, so don’t overwork it.
Gradually drizzle in ice water, one tablespoon at a time, just until the dough starts to hold together when you squeeze it. You don’t want it wet — just moist enough to form a ball.
Step 3 – Chill and Roll the Dough
Shape the dough into two disks, wrap them in plastic wrap, and chill for at least 30 minutes (or up to two days). This rest time allows the flour to hydrate fully and relaxes the gluten so the crust won’t shrink while baking.
When you’re ready to roll, dust your surface and rolling pin with flour. Roll from the center outward, rotating the dough a quarter turn after each roll to keep it even and prevent sticking.
Pro tip: If cracks appear around the edges, press them gently back together — don’t panic. It’s normal.
Step 4 – Assemble and Bake
If you’re blind baking (pre-baking before filling), fit the rolled dough into your pie dish, trim the edges, and prick the bottom with a fork. Line it with parchment paper, fill with pie weights or dried beans, and bake at 375°F (190°C) for about 15 minutes.
Remove the weights and bake for another 10 minutes until lightly golden.
For filled pies, add your filling, crimp the edges, and bake according to your recipe’s instructions.
Common Pie Crust Mistakes (and How to Fix Them)
Even experienced bakers make these — but now you’ll know how to fix (or avoid) them.
Tough Crust
Problem: Overmixing or adding too much water.
Fix: Use a light touch. Stop mixing as soon as the dough comes together, and don’t knead it like bread.
Soggy Bottom
Problem: Wet fillings or skipping pre-bake.
Fix: Blind bake the crust, and brush with a thin layer of beaten egg white before adding filling.
Shrinking Crust
Problem: Dough wasn’t rested before baking.
Fix: Chill it again once it’s in the pie dish. Cold dough holds its shape better.
Dry, Crumbly Dough
Problem: Not enough liquid or over-flouring the surface.
Fix: Add ice water one teaspoon at a time until the dough holds together.
Expert Tips for the Perfect Flaky Pie Crust
Sometimes, the little things make the biggest difference. Here’s what seasoned bakers swear by:
- Mix butter and shortening for the ideal balance of flavor and texture.
- Always chill your dough before rolling and before baking.
- Use a light touch when rolling — pressing too hard destroys flakes.
- Freeze your butter cubes before cutting them in for maximum flakiness.
- Brush your crust with milk or egg wash for a golden finish.
- Invest in good tools: a pastry cutter, rolling pin, and pie weights are worth it.
These habits are what separate a decent crust from an exceptional one.
Variations You Can Try
You don’t have to stick with the classic version every time. Once you’re comfortable, experiment a little:
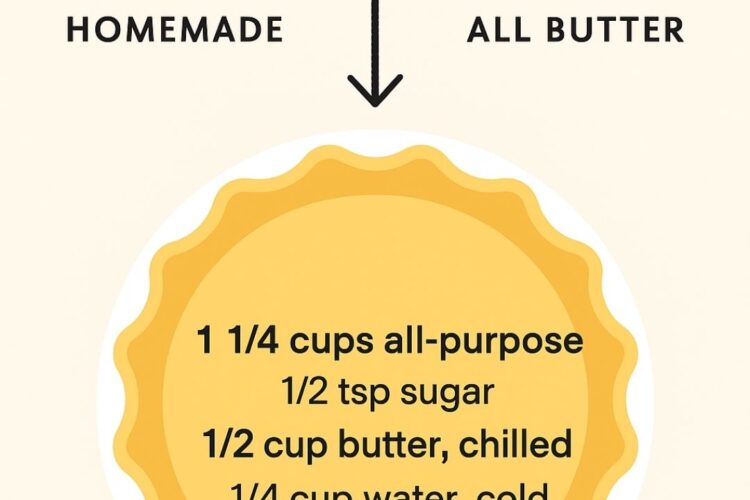
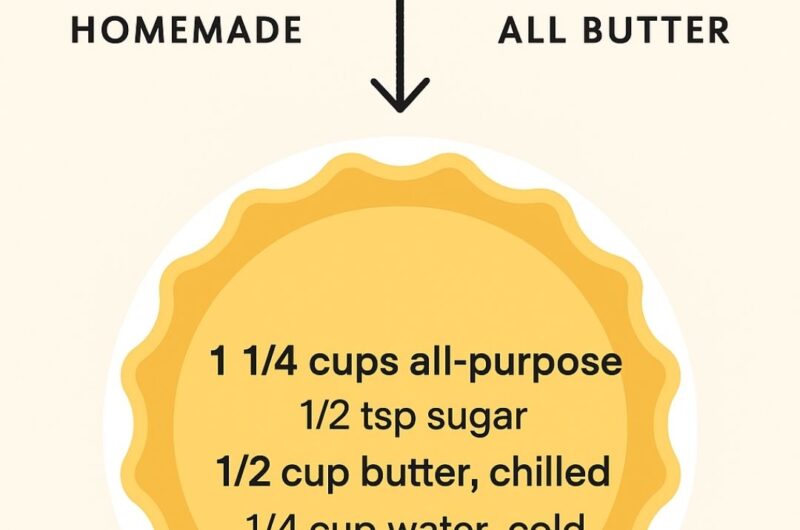
All-Butter Pie Crust
- The most flavorful and aromatic option.
- Crisp, rich, and perfect for fruit pies.
Shortening or Lard Pie Crust
- Flakier and softer than butter-only versions.
- Great for savory pies like quiche or pot pie.
Gluten-Free Pie Crust
- Use a 1:1 gluten-free flour blend or almond flour.
- Add a pinch of xanthan gum to mimic gluten’s elasticity.
Each version brings a slightly different character to your baking, so don’t be afraid to find your favorite.
Storage and Make-Ahead Tips
Homemade pie dough actually gets better with rest, so making it ahead is a smart move.
- In the fridge: Keep wrapped dough disks for up to 3 days.
- In the freezer: Store for up to 3 months. Thaw overnight in the refrigerator before rolling.
- Pre-baked crusts: Cool completely, wrap tightly, and store at room temperature for 2 days or in the fridge for up to a week.
If you bake often, consider doubling your recipe and freezing extra dough — future you will thank you.
Printable Recipe Card
Flaky Homemade Pie Crust Recipe
| Prep Time | Chill Time | Cook Time | Total Time | Yield |
|---|---|---|---|---|
| 15 minutes | 1 hour | 20 minutes | 1 hour 35 minutes | 1 double crust or 2 single crusts |
| Ingredient | Quantity |
|---|---|
| All-purpose flour | 2 ½ cups |
| Unsalted butter, cold and cubed | 1 cup (2 sticks) |
| Salt | 1 tsp |
| Ice water | 6–8 tbsp |
Instructions:
- In a large bowl, combine flour and salt.
- Cut in butter until the mixture looks crumbly with small pea-sized pieces.
- Add ice water one tablespoon at a time until dough holds together.
- Shape into two disks, wrap in plastic wrap, and chill for at least 1 hour.
- Roll out, fit into a pie dish, and bake as directed for your chosen pie.
FAQ: How to Make Flaky Homemade Pie Crust
What makes pie crust flaky?
Cold butter. When it melts in the oven, it creates steam, forming thin, crisp layers.
Can I use salted butter for pie crust?
You can, but reduce or skip the added salt. Unsalted butter gives you more control.
How do I keep my crust from shrinking?
Avoid stretching the dough and always chill before baking.
Is butter or shortening better?
Butter gives more flavor; shortening adds tenderness. Many bakers use a mix of both.
Can I make pie crust ahead of time?
Yes. Freeze it raw or pre-baked — it keeps beautifully for up to three months.
Conclusion
Learning how to make flaky homemade pie crust is one of those skills that transforms your baking forever. Once you feel the dough come together in your hands and see those golden, layered edges coming out of the oven, you’ll realize it’s not about perfection — it’s about practice and care.
Even if your first crust isn’t picture-perfect, it’ll still taste incredible. And next time, it’ll be better. That’s the beauty of homemade baking.
So roll up your sleeves, grab your butter and flour, and give it a try — because once you’ve tasted a pie made entirely by you, there’s no going back.
How to Make Flaky Homemade Pie Crust
Course: Irresistible DessertsCuisine: AmericanDifficulty: Easy15
minutes20
minutes35
minutesIngredients
All-purpose flour
Provides structure
Use unbleached flour for the best textureUnsalted butter
Adds flavor and creates flakes
Keep it cold; don’t overmixIce water
Helps bind dough
Add gradually until dough just holds togetherSalt
Enhances flavor
Don’t skip — it balances sweetness too(Optional) Vinegar or vodka
Prevents over-glutenization
Keeps dough tender and easy to roll
Directions
- Step 1 – Keep Everything Cold
Start by chilling your butter, mixing bowl, and even your flour if your kitchen is warm. Cold ingredients mean your butter stays solid until baking, which is the key to those beautiful flakes.
Tip: Work quickly, and if your dough starts feeling warm or sticky, pop it back in the fridge for a few minutes. - Step 2 – Mix the Dough Properly
In a large bowl, whisk together flour and salt. Add the cold butter cubes and use a pastry cutter or your fingertips to “cut” the butter into the flour until it looks like coarse crumbs with a few pea-sized chunks.
Those small butter pieces are what create texture later, so don’t overwork it.
Gradually drizzle in ice water, one tablespoon at a time, just until the dough starts to hold together when you squeeze it. You don’t want it wet — just moist enough to form a ball. - Step 3 – Chill and Roll the Dough
Shape the dough into two disks, wrap them in plastic wrap, and chill for at least 30 minutes (or up to two days). This rest time allows the flour to hydrate fully and relaxes the gluten so the crust won’t shrink while baking.
When you’re ready to roll, dust your surface and rolling pin with flour. Roll from the center outward, rotating the dough a quarter turn after each roll to keep it even and prevent sticking.
Pro tip: If cracks appear around the edges, press them gently back together — don’t panic. It’s normal. - Step 4 – Assemble and Bake
If you’re blind baking (pre-baking before filling), fit the rolled dough into your pie dish, trim the edges, and prick the bottom with a fork. Line it with parchment paper, fill with pie weights or dried beans, and bake at 375°F (190°C) for about 15 minutes.
Remove the weights and bake for another 10 minutes until lightly golden.
For filled pies, add your filling, crimp the edges, and bake according to your recipe’s instructions.
Recipe Video
Notes
- Expert Tips for the Perfect Flaky Pie Crust
Sometimes, the little things make the biggest difference. Here’s what seasoned bakers swear by:
Mix butter and shortening for the ideal balance of flavor and texture.
Always chill your dough before rolling and before baking.
Use a light touch when rolling — pressing too hard destroys flakes.
Freeze your butter cubes before cutting them in for maximum flakiness.
Brush your crust with milk or egg wash for a golden finish.
Invest in good tools: a pastry cutter, rolling pin, and pie weights are worth it.
These habits are what separate a decent crust from an exceptional one.