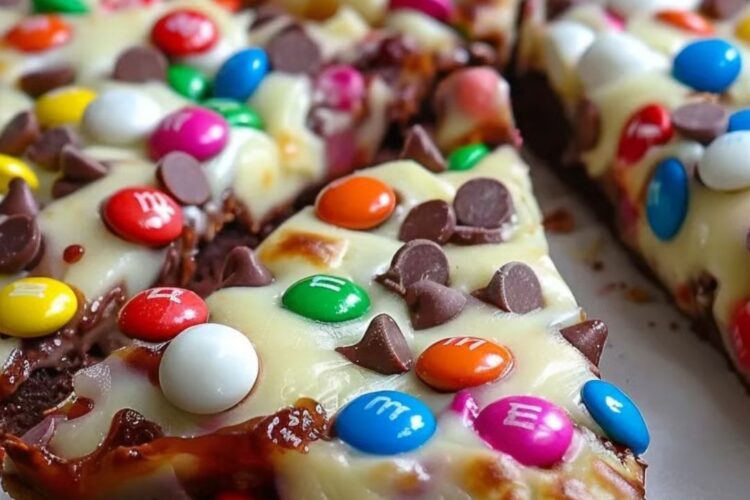
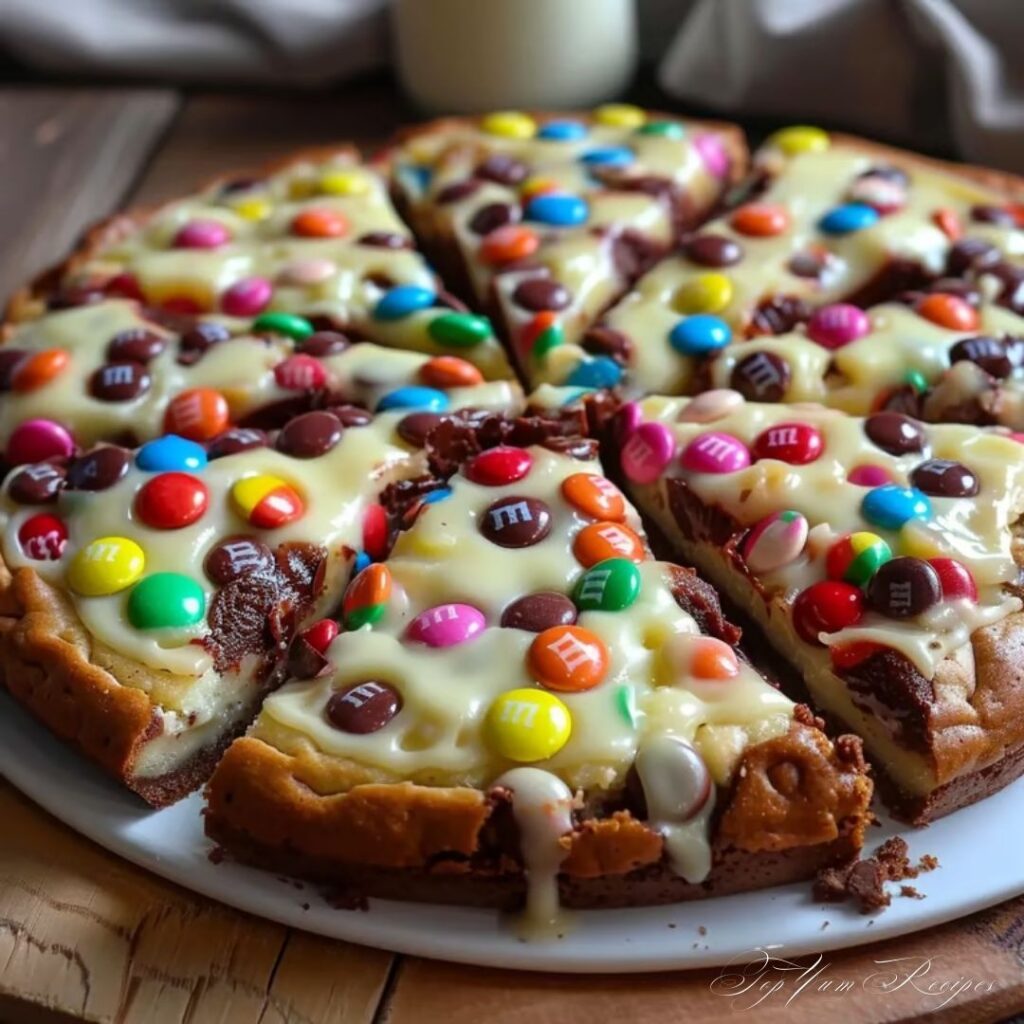
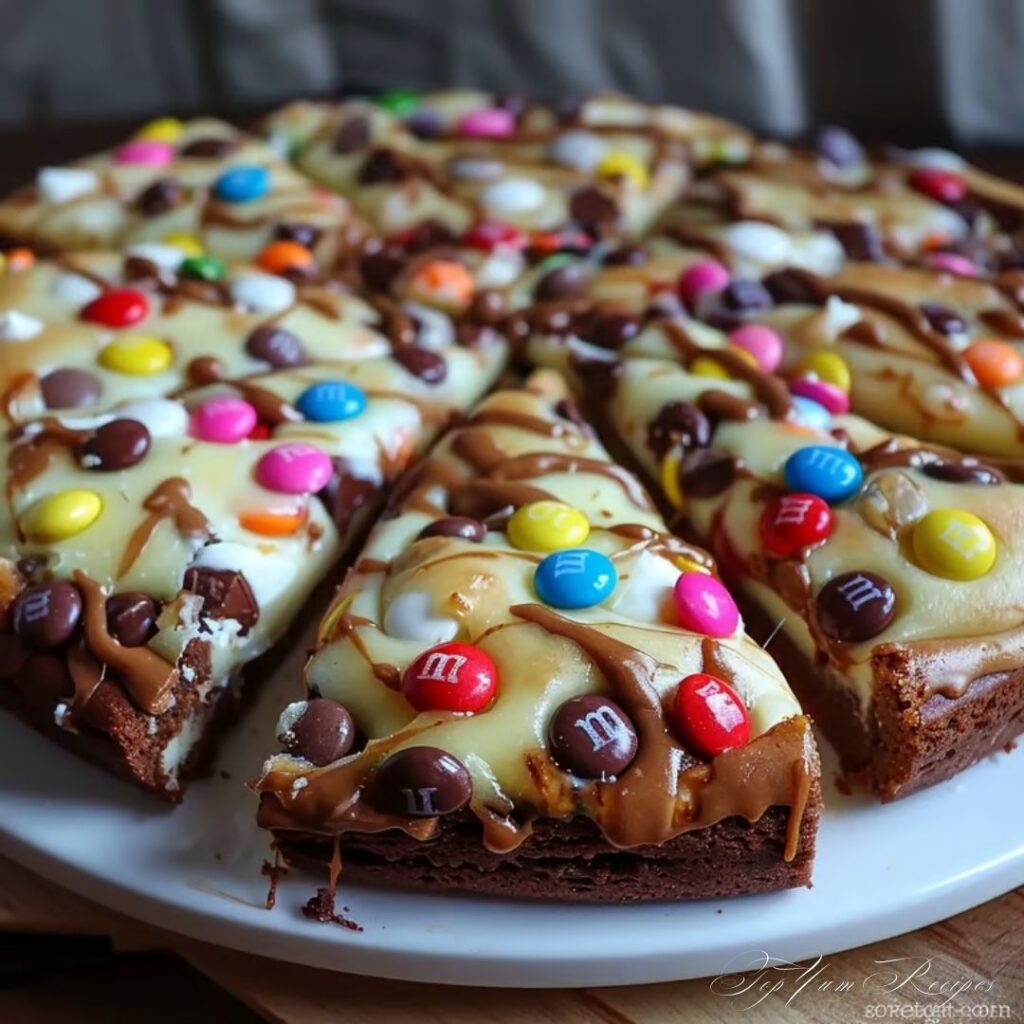
There are desserts you enjoy—and then there are desserts you remember. When you take the first bite of a White Chocolate Brownie Pizza, you’re not just tasting rich brownie and silky white chocolate. You’re tasting nostalgia, comfort, and that spark of delight that comes from sharing something sweet with people who matter to you.
Maybe you’ve seen dessert pizzas before. Maybe you’ve even tried one. But this one feels different. It’s the kind of treat that lets you slow down, get creative, and enjoy the process as much as the outcome. Whether you’re baking for a birthday, a cozy evening, a holiday get-together, or simply treating yourself, this recipe offers you the perfect blend of simplicity, elegance, and pure fun.
Let’s explore everything you need to know to create a White Chocolate Brownie Pizza that looks stunning, tastes incredible, and earns a permanent spot in your recipe book.
What Is White Chocolate Brownie Pizza?
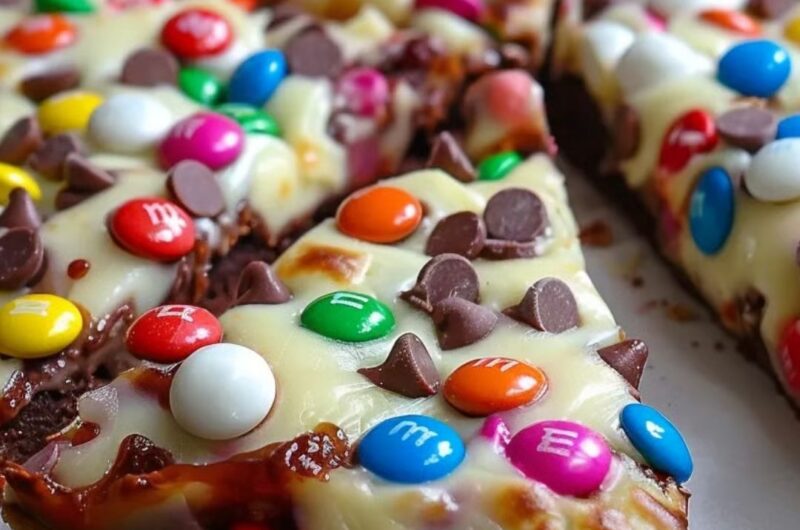
If you’ve never made or tried this dessert before, imagine this: a rich, fudgy brownie baked in a round “pizza” shape, topped with a velvety layer of melted white chocolate, then decorated with colorful toppings of your choice. It’s dessert meets creativity—comfort food with a playful twist.
Unlike traditional brownies, this dessert gives you a blank canvas to design. You can go bold with berries, stick with classic chocolate toppings, or decorate it to match a holiday theme. The beauty of it is that you control the look, the flavor, and the experience.
Why It Works So Well
- You get the depth and richness of a brownie.
- White chocolate adds a smooth, creamy sweetness.
- Toppings add color, crunch, and personalization.
- It’s easy to slice and share, like a real pizza.
- It turns any occasion into a little celebration.
It’s the kind of dessert that makes people smile before they even taste it.
Why You’ll Love This White Chocolate Brownie Pizza
A Dessert That’s Both Fun and Fancy
You know those desserts that look impressive but don’t require complicated techniques? This is exactly that. The glossy white chocolate layer and the customizable toppings turn a simple brownie into something that looks bakery-worthy—without the stress.
Kid-Friendly, Party-Approved
If you have children, this dessert becomes an activity. If you’re hosting adults, it becomes a conversation piece. You can make it holiday-themed, birthday-themed, or simply decorate it with whatever treats you already have in your pantry.
Simple Ingredients, Sophisticated Results
Even if you’re not usually a baker, this recipe works in your favor. The brownie base is forgiving, and the white chocolate topping is easy to prepare. The final result tastes like something you’d buy from a boutique dessert shop.
Ingredients You’ll Need for White Chocolate Brownie Pizza
Below is your easy, organized breakdown of ingredients. Using a table helps you gather everything quickly and keep your baking process smooth.
Brownie Base Ingredients
| Ingredient | Amount | Notes |
|---|---|---|
| Unsweetened cocoa powder | ½ cup | Choose rich, dark cocoa for deeper flavor |
| All-purpose flour | 1 cup | Scoop and level for accuracy |
| Sugar | 1 cup | Regular white granulated |
| Butter | ½ cup (melted) | Salted or unsalted both work |
| Eggs | 2 large | Room temperature gives better texture |
| Vanilla extract | 1 tsp | Optional but adds aroma |
| Salt | ¼ tsp | Enhances chocolate flavor |
White Chocolate Topping
| Ingredient | Amount | Notes |
|---|---|---|
| White chocolate chips | 1½ cups | Melt gently to avoid burning |
| Heavy cream | ¼ cup | Makes the topping silky |
| Cream cheese (optional) | 2 oz | For thicker, frosting-style topping |
Optional Toppings
You can mix and match these depending on the event:
- Strawberries
- Blueberries
- Crushed Oreos
- Caramel drizzle
- Mini marshmallows
- Toasted nuts (pecans, almonds, walnuts)
- Chocolate curls
- Sprinkles
These toppings don’t just add flavor—they add personality.
How to Make Your White Chocolate Brownie Pizza
This recipe is designed to be clear and beginner-friendly, while still giving you professional-quality results.
Step 1 – Prepare the Brownie Base
- Preheat your oven to 350°F (175°C).
- Grease a round pizza pan or line it with parchment paper.
- In a large bowl, whisk together the flour, sugar, cocoa, and salt.
- In a separate bowl, mix the melted butter, eggs, and vanilla.
- Combine wet and dry ingredients. Don’t overmix—you want a fudgy brownie, not a cakey one.
- Spread the batter evenly in the pan.
Step 2 – Bake the Brownie
- Bake for 15–20 minutes, depending on the thickness.
- When the edges are set and the center is slightly soft, it’s done.
- Let it cool completely before you add the topping. This step matters more than you think—warm brownie melts white chocolate instantly.
Step 3 – Prepare the White Chocolate Topping
- Heat the heavy cream just until warm—not boiling.
- Pour it over the white chocolate chips and let it sit for a minute.
- Stir until smooth and glossy.
- Add cream cheese if you want a thicker, spreadable layer.
Step 4 – Decorate Your Pizza
This is where the magic happens.
Spread the white chocolate topping evenly, then add your decorations while it’s still soft. Scatter berries, sprinkle cookies, drizzle caramel—whatever makes you smile.
Step 5 – Slice and Serve
- Let the topping set for 20–30 minutes for cleaner slices.
- Use a pizza cutter to create perfect “pizza” slices.
You now have a dessert that looks like artwork and tastes even better.
Tips for Making the Perfect White Chocolate Brownie Pizza
Keep the Brownie Fudgy
The key is not overbaking. A slightly underdone brownie becomes rich, soft, and perfect for holding toppings.
Melt White Chocolate Slowly
White chocolate is delicate. Heat it too fast, and it becomes grainy. So keep the heat low and the stirring gentle.
Cool Before Topping
Adding melted chocolate to a warm brownie turns it into a runny mess. Let it cool fully—even if you’re impatient.
Chill Before Slicing
This extra step gives your dessert that polished, professional look.
Store Correctly
- Refrigerate up to 3 days.
- Freeze slices for up to 2 months.
Delicious Variations to Try
Once you try the classic version, you might want to experiment. Here are some stunning variations:
Holiday Version
- Red and green sprinkles
- Crushed peppermint
- White chocolate drizzle
Perfect for Christmas cookie swaps or winter parties.
Spring or Summer Edition
- Fresh strawberries
- Thin kiwi slices
- Blueberries or raspberries
Fresh, bright, and perfect for warm days.
Cookie Lover’s Pizza
- Crushed Oreos
- Mini chocolate chips
- Chocolate fudge drizzle
A dream for chocolate lovers.
Nutty Caramel Delight
- Pecans
- Caramel sauce
- Sea salt flakes
Rich, sweet, and wonderfully balanced.
Nutrition Overview (Optional)
Here’s a general idea of what you’re enjoying, depending on your toppings:
- Calories per slice: 280–350
- Sugars: moderate to high
- Protein: 2–4 grams
- Fat: varies based on toppings
If you prefer a lighter version, consider using reduced-sugar white chocolate or fruit-only toppings.
FAQs About White Chocolate Brownie Pizza
Can I prepare White Chocolate Brownie Pizza ahead of time?
Absolutely. You can bake the brownie the day before and store it covered. Add the topping and decorations shortly before serving.
Why does my white chocolate turn lumpy or grainy?
It likely overheated. White chocolate burns easily, so melt it slowly and always use a bit of cream to smooth it out.
Can I use boxed brownie mix?
Yes! If you want to save time, boxed mix works beautifully.
How do I keep the toppings from sliding?
Chill the whole dessert for 20–30 minutes before slicing.
What toppings go best with White Chocolate Brownie Pizza?
Fresh berries, crushed cookies, colorful sprinkles, caramel drizzle, chocolate curls, or roasted nuts.
Conclusion
Your White Chocolate Brownie Pizza isn’t just another dessert—it’s a small celebration on a plate. With its fudgy base, creamy topping, and endless decoration possibilities, it gives you the freedom to create something uniquely yours. Whether you’re baking for guests, for your family, or simply for your own sweet moment of joy, this dessert delivers warmth, flavor, and fun in every slice.
If you’re ready to bring a little creativity into your kitchen, this is the recipe to try.
Call to Action
If you enjoyed this recipe, share your version—your toppings, your variations, your own twist. And if you want more dessert ideas like this, let me know and I’ll help you create an entire collection of show-stopping treats.
White Chocolate Brownie Pizza: The Dessert That Turns Any Moment Into a Celebration
Course: Irresistible DessertsCuisine: AmericanDifficulty: Medium1
pizza15
minutes30
minutes1
hour10
minutesIngredients
- Brownie Base
1 cup melted unsalted butter
2 cups regular sugar
4 large eggs, room temperature
2 teaspoons vanilla extract
1½ cups all-purpose flour
½ teaspoon salt
- Mix-ins & Toppings
1 cup white chocolate chips
1 cup colorful M&M’s, plus extra for sprinkling on top
Directions
- Step 1 – Prepare the Brownie Base
Preheat your oven to 350°F (175°C).
Grease a round pizza pan or line it with parchment paper.
In a large bowl, whisk together the flour, sugar, cocoa, and salt.
In a separate bowl, mix the melted butter, eggs, and vanilla.
Combine wet and dry ingredients. Don’t overmix—you want a fudgy brownie, not a cakey one.
Spread the batter evenly in the pan. - Step 2 – Bake the Brownie
Bake for 15–20 minutes, depending on the thickness.
When the edges are set and the center is slightly soft, it’s done.
Let it cool completely before you add the topping. This step matters more than you think—warm brownie melts white chocolate instantly. - Step 3 – Prepare the White Chocolate Topping
Heat the heavy cream just until warm—not boiling.
Pour it over the white chocolate chips and let it sit for a minute.
Stir until smooth and glossy.
Add cream cheese if you want a thicker, spreadable layer. - Step 4 – Decorate Your Pizza
This is where the magic happens.
Spread the white chocolate topping evenly, then add your decorations while it’s still soft. Scatter berries, sprinkle cookies, drizzle caramel—whatever makes you smile. - Step 5 – Slice and Serve
Let the topping set for 20–30 minutes for cleaner slices.
Use a pizza cutter to create perfect “pizza” slices.
Notes
- Tips for Making the Perfect White Chocolate Brownie Pizza
Keep the Brownie Fudgy
The key is not overbaking. A slightly underdone brownie becomes rich, soft, and perfect for holding toppings.
Melt White Chocolate Slowly
White chocolate is delicate. Heat it too fast, and it becomes grainy. So keep the heat low and the stirring gentle.
Cool Before Topping
Adding melted chocolate to a warm brownie turns it into a runny mess. Let it cool fully—even if you’re impatient.
Chill Before Slicing
This extra step gives your dessert that polished, professional look.
Store Correctly
Refrigerate up to 3 days.
Freeze slices for up to 2 months.