Picture this: you’re standing in your kitchen, staring at a birthday cake that half your guest list can’t eat. Maybe it’s a gluten intolerance. Maybe it’s a low-carb commitment they’re trying to stick to. Or maybe you’re the one who’s had to say “no thanks” one too many times at a party, watching everyone else dig into dessert while you nurse a cup of tea and pretend you’re fine with it.
That was you a year ago, if you’re anything like most people who stumble onto this recipe.
Then you find chia seeds sitting in your pantry, bought for a smoothie phase that fizzled out weeks ago, and something clicks. What if those little seeds could do more than thicken a breakfast bowl? What if they could hold together an entire cake — no flour, no gluten, no compromise on taste?
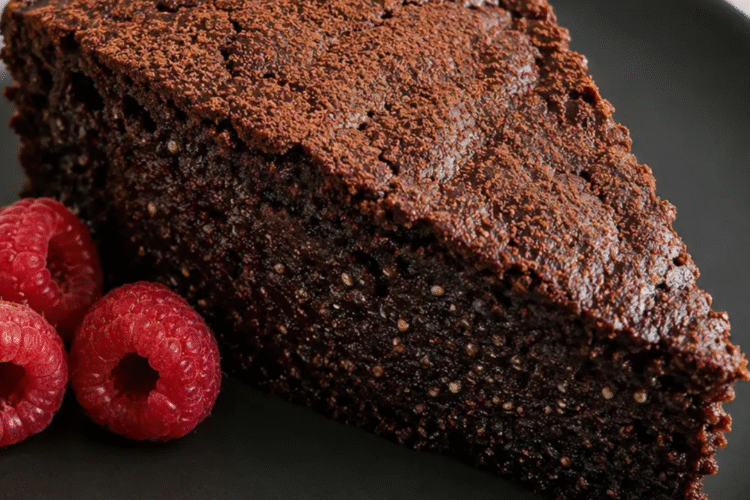
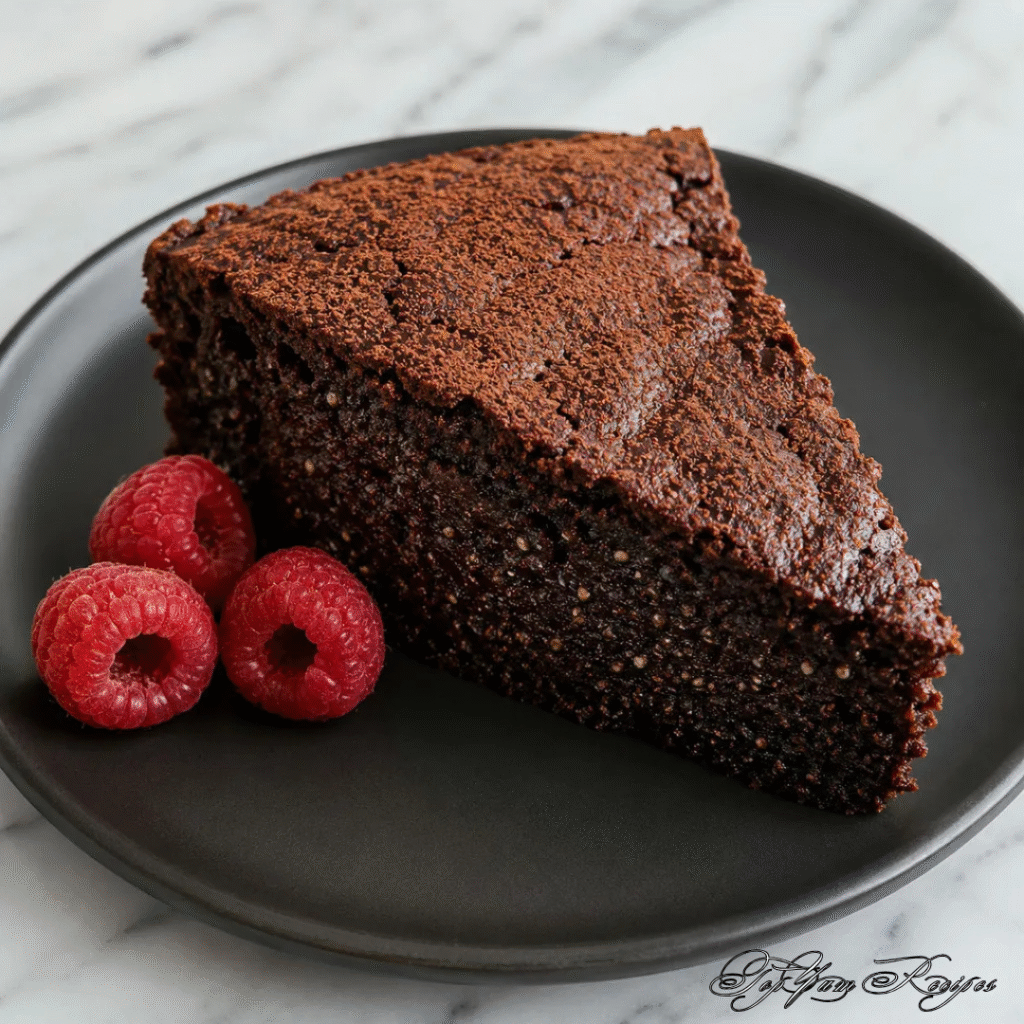
That’s exactly what a Chia Seed Chocolate Cake (No Flour) does. It’s rich. It’s dense in the best way. And it doesn’t taste like a “sorry, this is the healthy version” substitute — it tastes like chocolate cake, full stop. By the time you finish reading this, you’ll have everything you need to bake one yourself, understand why it works, and troubleshoot it if your first attempt doesn’t come out perfect.
What Is Chia Seed Chocolate Cake (No Flour)?
At its core, this cake swaps out wheat flour for chia seeds, using them as both a binder and a structural backbone. Instead of gluten holding the crumb together, you’re relying on the natural gelling power of chia — the same reaction you’ve probably seen happen in a jar of chia pudding overnight.
When chia seeds sit in liquid, they absorb up to ten times their weight in water and form a thick, gel-like coating around each seed. That gel acts almost like an edible glue, giving your batter the elasticity and moisture that flour would normally provide. The result is a cake that’s moist, holds its shape, and slices cleanly, without a trace of grittiness if you follow the process correctly.
This isn’t the only flourless cake out there — you’ve probably seen versions made with almond flour, black beans, or sweet potato. What sets your chia-based cake apart is the nutritional profile. It tends to run lower in carbohydrates and noticeably higher in fiber and plant-based omega-3s than most other flourless alternatives, which makes it a smart pick if you’re watching blood sugar or just trying to sneak more nutrients into dessert.
Why Chia Seeds Work as a Flour Substitute
A few reasons chia earns its spot as the star ingredient here:
- It’s rich in soluble fiber, which is what creates that gel-like binding effect once it meets liquid.
- The flavor is essentially neutral, so your chocolate stays front and center instead of competing with a “seedy” aftertaste.
- It adds plant-based omega-3 fatty acids and a modest protein boost to a dessert that would otherwise offer neither.
- It’s naturally free of gluten and grains, so you’re not relying on a processed flour blend to get there.
According to the USDA FoodData Central database, two tablespoons of chia seeds carry around 8 grams of fiber and roughly 5 grams of plant-based omega-3 ALA — numbers that hold up even after baking, since chia’s fiber content isn’t heat-sensitive the way some vitamins are.
Who This Recipe Is Best For
You’ll get the most out of this cake if:
- You or someone at your table has celiac disease or a gluten sensitivity.
- You’re following a lower-carb eating pattern and want a dessert that fits.
- You’re trying to add more fiber into your day without thinking about it too hard.
- You bake for a vegan household and need a version that skips eggs, too (more on that swap later).
Health Benefits of Chia Seed Chocolate Cake (No Flour)
You don’t need to pretend this cake is a health food — it’s still dessert, and it still has sugar in it. But compared to a standard flour-and-butter chocolate cake, it does bring a few real advantages to your plate.
The fiber content alone is worth mentioning. A typical slice of traditional chocolate cake might give you a gram or two of fiber. Your chia version can offer three to four times that, which means it digests more slowly and is less likely to leave you crashing thirty minutes after dessert. Add in the omega-3s from the chia seeds and the antioxidant compounds naturally found in cocoa, and you’ve got a treat that does a little more heavy lifting nutritionally than the average birthday cake.
Nutritional Comparison
| Nutrient (per serving) | Traditional Chocolate Cake | Chia Seed Chocolate Cake (No Flour) |
|---|---|---|
| Calories | ~350 kcal | ~220–250 kcal |
| Total Carbs | 45g | 20–25g |
| Fiber | 1–2g | 6–8g |
| Sugar | 30g | 12–15g (depends on sweetener used) |
| Protein | 4g | 6–7g |
| Gluten | Yes | No |
Figures are estimates based on standard recipe ratios and USDA nutritional data; exact values will shift depending on the sweetener and add-ins you choose.
Ingredients for Chia Seed Chocolate Cake (No Flour)
Before you preheat anything, get your ingredients lined up. You’ll notice this list splits naturally into three roles: the chia gel that replaces flour, your dry mix, and your wet mix that brings everything together.
| Ingredient | Quantity | Purpose |
|---|---|---|
| Chia seeds (whole or ground) | 1/3 cup | Flour/binder substitute |
| Water (for chia gel) | 1 cup | Activates the chia gel |
| Cocoa powder (unsweetened) | 3/4 cup | Chocolate flavor base |
| Eggs (or flax eggs for vegan) | 3 large | Structure and moisture |
| Almond flour or coconut flour | 1/2 cup (optional) | Extra texture support |
| Honey, maple syrup, or sugar substitute | 3/4 cup | Sweetness |
| Baking powder | 1 tsp | Leavening |
| Baking soda | 1/2 tsp | Leavening |
| Salt | 1/4 tsp | Balances sweetness |
| Vanilla extract | 1 tsp | Adds aromatic depth |
| Melted coconut oil or butter | 1/3 cup | Fat and moisture |
| Dark chocolate chips (optional) | 1/2 cup | Extra richness |
Ingredient Substitutions
Your kitchen, your rules. Here’s how to bend the recipe without breaking it:
- Going vegan? Swap each egg for a flax egg — one tablespoon of ground flaxseed mixed with three tablespoons of water, left to sit for five minutes until it thickens.
- Cutting sugar further? Monk fruit or an erythritol blend works well here and won’t throw off the texture the way some sugar substitutes do.
- Avoiding nuts? Skip the almond flour and either add a touch more chia gel or use oat flour instead, keeping in mind oat flour isn’t grain-free.
- Skipping dairy? Coconut oil steps in seamlessly for butter, and it adds a faint richness that pairs nicely with the cocoa.
How to Make Chia Seed Chocolate Cake (No Flour) — Step-by-Step Instructions
Once your ingredients are prepped, the process itself moves quickly. Give yourself about 45 minutes total, including the resting time your chia gel needs before it’s ready.
Step-by-Step Method
- Combine the chia seeds with water in a small bowl and let the mixture sit for 15 minutes, stirring once halfway through so it gels evenly instead of clumping.
- While that rests, preheat your oven to 350°F (175°C) and grease or line an 8-inch round cake pan.
- In a separate bowl, whisk together your cocoa powder, baking powder, baking soda, and salt until there are no visible lumps.
- In a third bowl, whisk your eggs (or flax eggs), sweetener, melted oil, and vanilla extract until the mixture looks glossy and well combined.
- Fold the chia gel into the wet mixture, stirring gently until fully incorporated.
- Add the dry ingredients to the wet mixture and fold just until combined — don’t overmix, or your cake will turn dense in the wrong way. Stir in chocolate chips if you’re using them.
- Pour the batter into your prepared pan and smooth the top with a spatula.
- Bake for 25 to 30 minutes. You’re looking for a toothpick that comes out mostly clean, with maybe a few moist crumbs still clinging to it.
- Let the cake cool in the pan for 10 minutes before transferring it to a wire rack to finish cooling completely.
Common Mistakes to Avoid
A few small missteps account for almost every disappointing result with this recipe:
- Rushing the chia gel. Skip the 15-minute rest and you’ll end up with a gritty, unevenly textured cake instead of a smooth one.
- Overbaking. Because there’s no flour to hold extra moisture, this cake dries out faster than a traditional one — start checking a few minutes early.
- Skipping the sift. Cocoa powder clumps easily, and those clumps won’t fully dissolve once they’re in the batter, so sift before you mix.
Tips for the Best Chia Seed Chocolate Cake (No Flour)
You can get a genuinely great result on your first try if you keep a few things in mind.
Pro Baking Tips
- Reach for Dutch-process cocoa powder if you can find it — it gives you a deeper, less bitter chocolate flavor than natural cocoa.
- A pinch of instant espresso powder stirred into the dry mix intensifies the chocolate without adding a coffee taste you’d notice.
- Let the finished cake rest overnight in the fridge before serving if you can wait that long. The chia continues to set the crumb, and the texture the next day is noticeably better than fresh out of the oven.
Serving and Pairing Ideas
- Fresh raspberries or strawberries cut through the richness nicely.
- A dollop of whipped coconut cream keeps the whole dessert dairy-free if that matters to you.
- Served slightly warm with a scoop of your favorite dairy-free ice cream, this cake edges into “why would I ever make a flour version again” territory.
Storage and Make-Ahead Instructions
This cake actually holds up well over a few days, which makes it a solid make-ahead option for events.
How to Store Chia Seed Chocolate Cake (No Flour)
- Room temperature: Keep it covered for up to 2 days.
- Refrigerator: Store in an airtight container for 5 to 7 days.
- Freezer: Wrap tightly in plastic wrap and foil, and it’ll keep well for up to 3 months. Thaw overnight in the fridge before serving.
Variations of Chia Seed Chocolate Cake (No Flour)
Once you’ve got the base recipe down, you have a few directions you can take it:
- Chia Seed Chocolate Lava Cake: Bake the batter in individual ramekins and pull them from the oven a few minutes early for a molten center.
- Chia Seed Chocolate Zucchini Cake: Fold in shredded zucchini for extra moisture and a sneaky vegetable boost.
- Chia Seed Chocolate Mug Cake: Scale the recipe way down for a single-serving version you can make in the microwave in under two minutes.
- Vegan Chia Seed Chocolate Cake: Use the flax egg swap mentioned earlier for a fully plant-based version that doesn’t sacrifice texture.
Frequently Asked Questions About Chia Seed Chocolate Cake (No Flour)
Is Chia Seed Chocolate Cake (No Flour) actually gluten-free? Yes. Since there’s no wheat flour anywhere in the recipe, it’s naturally gluten-free — just double-check that your baking powder and chocolate chips are certified gluten-free too, since cross-contamination sometimes sneaks in through those.
Can I make Chia Seed Chocolate Cake (No Flour) vegan? You can. Replace the eggs with flax eggs and use coconut oil instead of butter, and the recipe holds together just as well.
Does Chia Seed Chocolate Cake (No Flour) taste like chia seeds? Not really. Chia seeds are close to flavorless on their own, so what you’ll actually taste is the cocoa and chocolate — the chia’s job is texture and moisture, not flavor.
How long does Chia Seed Chocolate Cake (No Flour) last? About 2 days at room temperature, up to a week in the fridge, and up to 3 months in the freezer if you wrap it well.
Can I use ground chia seeds instead of whole chia seeds? Yes, and it’s actually a good swap if you want a smoother crumb. Whole seeds give you a slight bite in every slice, while ground chia blends in more seamlessly.
Conclusion
You started this article picturing a cake that left half your guests sitting on the sidelines. Now you’ve got a recipe that puts everyone back at the table — dense, chocolatey, and built almost entirely on a pantry staple you probably already own. A Chia Seed Chocolate Cake (No Flour) isn’t a compromise. It’s just a genuinely good cake that happens to be gluten-free, higher in fiber, and a little kinder to your blood sugar than the version you grew up with.
Give it a try this week. Bake it for the next birthday, the next potluck, or honestly, just for yourself on a random Tuesday. And once you’ve had a slice, come back and let us know how yours turned out — did you try one of the variations, swap in a different sweetener, or find a trick that made your version even better? Drop a comment, share a photo, or rate the recipe below. Your kitchen experiments help the next person figure out their own version of this cake.